
Dragon stone chamber puzzle in Crimson Desert: walkthrough
The dragon stone chamber puzzle in Crimson Desert looks modest from the rim: a circular pit, a painted wall, three waist-high disks. Under the floor, though, it is doing real work. The room folds a memory-driven door into a rotation mechanic, then ties the whole thing to a regional reward. The result is an encounter that takes a few minutes to play and noticeably longer to read once you start pulling it apart.
This walkthrough is written for a first-time player. It covers the route from the Howling Hill camp, the Sword of the Cursed memory, the disk rotation step, and the reward room, and it draws the route and mechanics from the public reference at IGN. If you are a developer, the later sections go further into how the room is built and where it tends to break.
Where the dragon stone chamber puzzle sits in Crimson Desert
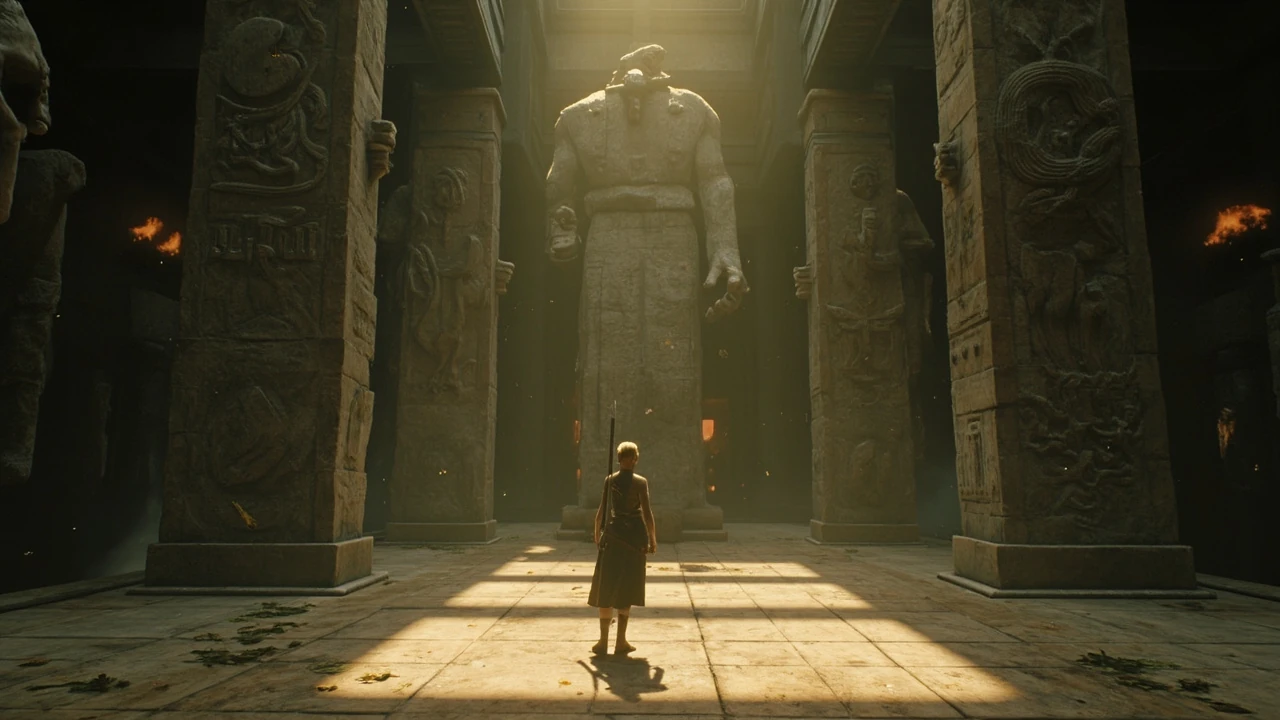
The pit sits roughly 700 meters south-southeast of Hernand Town, on terrain that is faster to cross once the Howling Hill camp is unlocked. From the camp, the road runs southeast until the ground opens into a large hole. Drop to the bottom, and the room is already framed for you: a near-circular pit, a mural painted on the northern rock face, and the disk platform sitting in front of it.
Players without the Howling Hill camp can still walk in from Hernand Town, but the run is longer, crosses more open ground, and exposes the player to more random encounters. The camp route is the recommended entry because the approach is shorter and the player arrives at the mural already oriented toward the focal point of the room.
Two stages in one room
The encounter is built as two stages in the same space. Stage one is the Sword of the Cursed memory, which doubles as the door. Stage two is the disk-rotation puzzle, which sits behind that door and unlocks the reward. Reading the room as two stages in one encounter is the cleanest way to track what is happening on screen.
| Stage | Player action | Result |
|---|---|---|
| Approach the mural | Reach the pit south of Howling Hill | Mural becomes the focal point of the room |
| Watch the memory | Use the Visone at the painted wall | Sword of the Cursed plays on the wall |
| Push the painted tree | Walk into the mural and keep pushing | Hidden stone block shifts and the door opens |
| Enter the disk chamber | Step through into the pit proper | Disks are reachable from the entrance |
| Rotate the three disks | Interact with each disk until aligned | Door at the far side of the chamber opens |
| Collect the reward | Approach the Abyss Cresset | Artifact, memory, and map markers unlocked |
Each row is a state in a short state machine. The door stage teaches the push input, the disk stage teaches the rotation input, and the reward ties the chamber to the wider Hernand region. There is no inventory check, no companion interaction, and no timer.
Reading the room: layout, sightlines, and spatial cues
The pit is near-circular and roughly the size of a small boss arena, with sheer walls and a single mural on the northern face. The layout does three things at once. It restricts movement so the player has no option but to interact with the room’s focal point. It hides the door behind a piece of environmental storytelling, so the player has to engage with the mural before they know a door exists. And it puts the disks on a low platform, which means the player’s camera sits slightly above the disks and the engraved symbols are clearly readable from the entrance.
That last point is the reason most players can read the puzzle at all. A lot of rotation puzzles fail because the player cannot see the disk face from a normal play distance. In this chamber, the disks sit at hip height, the symbols are large enough to read from the room’s entrance, and the lighting picks out the engraved surface without throwing harsh shadows across it.
What to check on a first visit
Before a player commits to the puzzle, there are a few layout checks worth running in the first minute. They are the same checks an environment pass would cover, and they catch the issues that turn a fair room into a frustrating one.
- Walk into the chamber from the entrance and confirm the disks are readable without leaning or crouching.
- Trigger the memory and confirm the camera framing does not clip the mural or the player.
- Check that light pools cover the disks during the day-night cycle and during weather changes.
- Confirm the door that opens at the back of the chamber is visible from the disk platform once the puzzle is solved.
- Verify that the player cannot climb, glitch, or fall out of the chamber into geometry that was not authored.
None of these checks are unique to this room. They are the minimum that any rotation-puzzle chamber should pass before it ships, and most of them can be folded into a regular environment pass.
The soft tutorial: Sword of the Cursed as a memory
The door stage is delivered as a memory fragment rather than a UI prompt. When the player equips the Visone near the painted wall, a memory plays, and inside that memory the player sees a figure push into a painted tree. The mural in the present-day chamber contains the same tree, and the only way to open the door is to walk into that mural and keep pushing as the secret stone block begins to move.
This is a clean example of a diegetic tutorial. The game shows the player the action in a memory and then plants the same object in the world. The player who connects the two gets through the door. The player who does not connect them wanders around the pit, sometimes for several minutes, before they try something more direct.
The design tension here is between discoverability and respect for the player’s attention. A heavier-handed version of the same encounter would put a button prompt on the mural. A lighter version would let the player push any part of the wall. Crimson Desert sits in the middle: the memory exists, the painted tree is the visual anchor, and the input itself is the most basic movement verb.
What the memory teaches, and what it does not
It is worth separating the memory’s job from the disk-rotation puzzle’s job. The memory is responsible for teaching the door input. The disk puzzle is responsible for teaching the disk-rotation input. The two share the same room but not the same mental model, and that is the point. A player who has watched the memory can solve the door, but they still have to learn how the disks work.
That separation matters because it gives each stage its own cognitive budget. The room reads as two related moments rather than one bloated puzzle, and a player who gets stuck on one stage still has the other stage’s progress to fall back on.
The disk-rotation mechanic: how it works in practice
Once the player is inside the disk chamber, the second stage begins. Three engraved stone disks sit in a pit, each one large enough to be a waist-high table in the world. The player can interact with each disk to rotate it, and each rotation step clicks into a fixed position. The puzzle does not require the player to collect the regional murals. As long as the three disks are rotated into the correct configuration, the puzzle will complete.
From the player’s side, the puzzle is fidgety rather than difficult. Each disk has a small number of valid orientations, the player can see the symbols on the disk face, and the only real challenge is to find the orientation that the rest of the room is asking for. The reward is a door at the far side of the chamber, which opens to a small side room containing an Abyss Cresset, the Abyss Artifact, and the Memories of Abundance.
From a developer’s side, the puzzle is a finite-state interaction: each disk has a small set of states, the combination of states determines whether the door unlocks, and the rest of the system is decoration. The interesting engineering questions are not about the disk logic, which is trivial. They are about input feedback, save state, and what happens if a player leaves mid-puzzle.
Input feedback and the feel of a rotation puzzle
Rotation puzzles live or die on tactile feedback. A disk that snaps into position with no haptic, no audio, and no camera response feels like a UI element from an inventory screen, not a piece of world geometry. The chamber leans on the opposite approach. Each click is audible, the disk settles with a short weight, and the camera stays planted on the platform so the player can see the new orientation without re-aiming.
For a team building a similar mechanic, the practical checklist is short:
- Give each rotation step a distinct audio cue that does not overlap with footstep audio.
- Add a short animation on the disk so the new orientation is visible during the snap.
- Keep the camera stable during rotation; let the player lean, not the camera.
- Persist the disk state across save and reload, including partial progress.
- If the puzzle can be re-entered after failure, make sure the disks reset in a way that does not feel punitive.
None of these items are visible in a design document, but together they are the difference between a puzzle that feels physical and one that feels like a checkbox.
Solution path: how a player completes the dragon stone chamber puzzle
For a reader who wants to clear the encounter, the path through the chamber is short once the soft tutorial is read. The notes below describe the sequence in practical terms, separated into approach, memory, and rotation, and they assume only the information a first-time player would reasonably have after watching the memory once.
Approach
Fast travel or ride to the Howling Hill camp. Head southeast along the road until you find the large hole in the ground. The chamber is at the bottom of the drop, and the mural is on the northern rock face. If you have not unlocked the camp, the chamber is roughly 700 meters south-southeast of Hernand Town, but the camp route is faster and exposes the player to fewer random encounters on the way in.
Memory stage
Equip the Visone at the mural and watch the Sword of the Cursed memory to its end. The memory shows a figure pushing a painted tree, and the same tree appears on the mural in front of you. Walk into the painted tree, keep walking into the mural, and the stone will begin to shift. Continue pushing until the wall opens enough to step through into the disk chamber.
Rotation stage
Inside the disk chamber, approach each of the three disks in turn. Rotate each one until its engraved symbols line up with the configuration implied by the chamber. A player who prefers to work it out by inspection can do so without the reference guide, but the reference documents the exact orientations if the room is fighting back. Once all three disks are correct, a door at the far side of the chamber opens.
Reward
Cross the threshold into the small side room and approach the Abyss Cresset. Collect the Abyss Artifact and the Memories of Abundance, which together unlock the hidden place locations around the Hernand region. From here the player is free to leave through the same door or to backtrack to the disk platform, which now sits behind the open door.
What a player gets for solving the chamber
The reward for solving the dragon stone chamber puzzle is a bundle rather than a single item. The Abyss Artifact, the Memories of Abundance, and the hidden place locations around Hernand together form a small content arc that extends past the chamber itself. The artifact is the headline reward, the memories add a layer of narrative payoff, and the hidden place locations pull the player back into the wider map.
That layering is a deliberate design choice. A single reward would have felt like a chest at the end of a corridor. A layered reward makes the chamber feel like a starting point for a small sub-arc, which raises the perceived value of the puzzle without raising the cost of the room itself. The table below breaks the reward structure into the player’s experience, the designer’s intent, and the failure signal that tells you the reward is misaligned.
| Reward element | Player experience | Designer intent | Failure signal |
|---|---|---|---|
| Abyss Artifact | A named, high-rarity collectible | Tie the chamber to the wider artifact economy | Player does not understand what the artifact is for |
| Memories of Abundance | A story fragment unlocked at the moment of completion | Reward players who watch memory cutscenes | Memory plays after the player has already left the room |
| Hidden place locations | New map markers around the Hernand region | Pull the player back into the open world | Markers appear but the player cannot find them |
| Abyss Cresset interaction | A small, tactile reward moment | Anchor the chamber in a physical prop | Player walks past the cresset and out of the room |
When a team is calibrating their own gated-room rewards, the most useful question is not “what item do we drop.” It is “what does the player do with the reward after they leave the room.” If the answer is “look at it in the inventory and forget,” the reward is misaligned. If the answer is “go to three new map markers and continue the arc,” the reward is doing its job.
Failure modes players actually hit
Every gated room has a short list of failure modes that show up the moment the encounter ships. The dragon stone chamber puzzle is no exception. The list below is a working catalog of the issues that QA teams typically flag during the first week of public play. None of them are catastrophic on their own, but together they determine whether the chamber feels fair or feels like a wall.
- Memory ignored: the player never equips the Visone at the mural, because they do not realise a memory can be triggered there.
- Mural treated as decoration: the player admires the painted tree, then walks around the pit looking for a switch or a lever.
- Disk misalignment confusion: the player rotates each disk fully and then has to walk around the platform to inspect the symbols from another angle.
- Door missed: the player solves the disks but does not see the door at the far side, because the lighting is too dim or the door frame is too narrow.
- Reward walked past: the player solves the puzzle, sees the side room, and leaves because the Abyss Cresset does not look like an interactable.
- Save during partial rotation: the player rotates one disk, quits to the menu, and returns to find the disk in a different state than they left it.
Each of these failure modes is solvable with a small change. The memory issue is solved with a visual nudge near the Visone. The mural issue is solved with a faint light or a particle hint around the painted tree. The disk issue is solved by enlarging the symbols or by adding a top-down camera option while the player is interacting. The door issue is solved with a marker or a brief light leak. The reward issue is solved with a prompt or an outline. The save issue is solved with explicit state persistence on each disk.
The point is not that Crimson Desert shipped with any of these problems fixed or unfixed. The point is that the encounter has the same failure surface as any other gated-room puzzle, and a team that has the catalog in front of them can pre-empt most of them in prototype.
Designing your own gated-room encounter: lessons from the chamber
For a team that wants to build a chamber with the same shape as the dragon stone chamber puzzle, the design can be reduced to a small set of decisions. None of these decisions are mechanically novel, but they are the ones that most teams get wrong on the first pass.
Decision 1: pick the number of stages
A two-stage chamber like the dragon stone chamber puzzle is a workable default. One stage is too thin to feel meaningful, three stages in a single room begins to feel like a dungeon, and two stages gives the designer room to split the tutorial from the mechanic. The rule of thumb is to ask whether each stage teaches a distinct verb. If yes, keep them as two stages. If no, merge them.
Decision 2: pick the soft tutorial medium
The chamber uses a memory fragment. Other valid options include an overheard conversation, a corpse with a note, a fresco in a side room, or an NPC who walks the player through the action once. The medium should match the game’s narrative register. A memory fragment is appropriate for a game that already treats memories as first-class content, and a note is appropriate for a game that leans on text. The medium is not the message. The message is that the tutorial exists in the world and rewards attention.
Decision 3: pick the mechanic
Disk rotation is one of the older spatial-reasoning mechanics in the genre, and it works because the player can see the target state. When a team is choosing a mechanic, the most useful question is “can the player see the goal state at the moment they are solving the puzzle.” If yes, the mechanic is on solid ground. If no, the mechanic will need an additional layer of feedback, and that layer is where most of the design effort ends up.
Decision 4: pick the reward shape
A single item is a fine reward for a small chamber, but the dragon stone chamber puzzle uses a bundle plus a region-level reward. The bundle is the moment, and the region-level reward is the tail. When a team is calibrating reward, the practical question is how far the player should travel from the chamber after they finish it. The farther the travel, the more the reward should pull the player into the wider world.
Decision 5: pick the failure recovery path
Every gated room needs a recovery path. The chamber’s recovery path is implicit: the player can leave, return, and find the disks in a known state. A team that is shipping a similar encounter should decide in advance whether partial progress is persisted, whether the room resets on a timer, and whether the player can skip the encounter entirely by finding a different route. Those decisions are cheap to make at design time and expensive to make after release.
Engine and tooling notes for a similar encounter
From an implementation perspective, the dragon stone chamber puzzle is a small state machine attached to a small set of interactable props. The disk logic is essentially a lookup table: each disk has a small set of valid orientations, the puzzle as a whole has a single correct combination, and the door transitions from locked to open when the combination matches. Most engines can express this in a few hours of work, and the bulk of the time will go into the interaction layer rather than the logic layer.
For an Unreal or Unity project, the practical structure looks roughly like the table below. The exact APIs will vary by engine and version, and none of these classes are presented as a real production API, but the shape of the work is the same.
| Component | Responsibility | Common failure |
|---|---|---|
| Disk interactable | Rotates between a fixed set of orientations on player input | Snap rotation fights the player’s camera |
| Puzzle controller | Holds the solved state and the correct combination | State desyncs after a save and reload |
| Door trigger | Locks or unlocks based on the puzzle controller’s state | Door animates before the player can see it |
| Memory sequencer | Plays the diegetic tutorial at the right time | Memory plays in the wrong room or at the wrong trigger |
| Reward container | Spawns the artifact, memory, and map markers on completion | Reward spawns before the player has crossed the door |
The “common failure” column is the one actually worth discussing in code review. Each row points at a class of bug that shows up after the first round of playtesting, and each of them is preventable with a small unit test or an editor-only debug overlay.
Sources for checking: Pearl Abyss’s official Crimson Desert site and the game overview on Wikipedia.
QA, validation, and how to test a gated chamber
Validation for a gated-room encounter is not the same as validation for a combat encounter. Combat has a clear win condition and a clear fail condition. A puzzle room has many soft fail conditions, most of which look like “the player walked away” rather than “the player died.” QA for a chamber like the dragon stone chamber puzzle needs to be designed around that asymmetry.
The list below is a working QA checklist for a gated chamber. It is not exhaustive, but it covers the categories of issue that show up in public play.
- First-time clear: a tester who has never seen the room should clear it without external hints within the time budget the designer set.
- Memory-only clear: a tester who watches the memory but ignores the disks should fail in a way that is recoverable.
- Skip attempt: a tester who tries to bypass the door should not be able to do so without breaking level geometry.
- Save and reload: a tester who quits during partial rotation should return to a known state.
- Reset behaviour: a tester who fails the puzzle and re-enters the room should see a clean reset, not a partial state.
- Accessibility pass: a tester using reduced motion, colorblind modes, or audio-only feedback should be able to clear the room or be clearly told why they cannot.
- Low-spec pass: a tester on the target minimum hardware should see the same room the designer saw, without pop-in on the disk symbols.
Each of these tests can be expressed as a single scripted playtest. The interesting design work is not in writing the test; it is in deciding what the time budget is and what “recoverable” means for a given room. Those two numbers are where most encounter design disagreements eventually land.
Accessibility considerations for a rotation-puzzle room
Rotation puzzles are a known accessibility friction point. A player with limited fine motor control may struggle to time a click on a rotating disk, a player with low vision may not be able to read the engraved symbols at gameplay distance, and a player with audio sensitivity may find the snap sound uncomfortable. None of these issues make the chamber unplayable, but each of them narrows the audience.
The dragon stone chamber puzzle’s design choices have accessibility implications that are worth naming explicitly. The disks are at a readable distance and the rotation uses a basic interaction verb, which is good. The symbols rely on shape recognition rather than color, which is good. The memory stage is a cutscene rather than a UI prompt, which is good for players with reading-related accessibility needs and bad for players who cannot easily switch to the memory trigger. The reward is a tangible cresset, which is good.
For a team building a similar encounter, the practical accessibility checklist is short:
- Provide a high-contrast or symbol-only mode for the disk symbols.
- Allow the player to slow or pause the rotation animation.
- Offer an audio cue when each disk snaps into a valid orientation.
- Make the door that opens at the end of the puzzle visible from the disk platform.
- Provide a soft skip or hint for the memory stage after a single failure.
These are not hypothetical. Each of them maps to a real accessibility need, and each of them is a small enough change to ship in a single patch.
How the chamber compares to other gated-room designs
The dragon stone chamber puzzle is not unique. There are gated-room puzzles in many open-world games that use a similar two-stage structure, a similar diegetic tutorial, and a similar rotation mechanic. The useful comparison is to look at the differences in how those games handle the same design problem. The table below compares the chamber to two adjacent approaches, one from the same genre and one from a different design tradition.
| Aspect | Dragon stone chamber (Crimson Desert) | Classic tomb rotation puzzle | Shrine puzzle (BotW-style) |
|---|---|---|---|
| Tutorial medium | Memory fragment | Wall carving with a matching prop | Sheikah slate prompt and a short NPC hint |
| Mechanic | Three rotating disks with engraved symbols | Single large disk or paired disks | Multiple small interactables in sequence |
| Reward shape | Bundle plus region-level unlocks | Single chest or unique item | Spirit orb plus inventory upgrade |
| Failure recovery | Implicit: re-enter and retry | Explicit reset lever or restart | Teleport out and return |
| Discovery path | Soft funnel from a regional camp | Hidden entrance behind a destructible | Aerial view from a tower or pin |
The columns are not exhaustive. They are the columns that matter most for design parity. When a team is calibrating their own gated-room encounter, the comparison they should run is not “which is the best design.” It is “which of these design choices matches the rest of our game.” A memory-fragment tutorial only works if the rest of the game treats memory fragments as first-class content. A shrine-style teleport out only works if the rest of the game supports fast travel into the encounter. The design that fits the game is the design that ships.
What the chamber teaches a junior designer
For a junior designer reading this article as a case study, the dragon stone chamber puzzle is a workable object lesson because it is small enough to internalise. It has a single room, a single mechanic, a single reward, and a single soft tutorial. That means every choice in the room is doing visible work, and there is no padding to hide behind. A senior designer reading the same encounter can use it as a baseline against which to test more complex rooms.
The lessons a junior should take away, in priority order, are: split the tutorial from the mechanic, make the goal state visible, give the reward a tail that extends beyond the room, and pre-empt the soft failure modes in prototype. None of these are sophisticated, all of them are easy to forget, and a junior who can apply them to a one-room encounter is well on the way to designing a five-room dungeon without falling into the same traps.
What the chamber teaches a senior designer
For a senior designer, the chamber is interesting precisely because it is small. A large encounter can hide design problems in production value. A small encounter cannot, and the dragon stone chamber puzzle has no production value to hide behind. The camera framing is functional, the lighting is functional, and the disk art is functional. That means every design decision is exposed, and the design has to do its own work.
The senior-level lessons are about restraint. A senior designer can look at the chamber and identify the moments where the design said “no” to a feature. There is no inventory check, no companion interaction, no platforming, no timed sequence. The room is exactly the room it needs to be, and that restraint is the design choice that makes the rest of the choices legible.
Working with reference material and walkthroughs
Designers who want to dig further into the dragon stone chamber puzzle as a case study can read the public walkthrough at IGN for the exact disk orientations, the precise route from the Howling Hill camp, and the chamber’s relationship to the wider region, with the same room described in detail on the Dragon’s Stone Chamber puzzle solution wiki page, which provides useful background for this point. For a studio lead, the value of looking at public walkthroughs during a project’s research phase is that they make the soft failure modes visible. A walkthrough is, by definition, a path through the encounter that worked for someone. Comparing the walkthrough’s path to your own encounter’s path is one of the cheapest QA exercises a small team can run before they start writing test scripts.
Production placement: when to build a chamber like this
A gated-room encounter like the dragon stone chamber puzzle is most useful in the mid-to-late content of a region. In the early hours of an open world, the player is still learning the verb set, and a two-stage chamber can overstay its welcome. In the late hours, the player is moving through the world efficiently, and a chamber that respects their time is welcome. The mid-to-late window is when the player has enough vocabulary to read the soft tutorial and enough motivation to engage with a layered reward.
For a team planning a region’s content, the practical rule is to budget one chamber of this shape per region, and to place it where the regional reward economy can absorb the unlock. The chamber does not work as a standalone puzzle, because the reward does not pay off. The chamber works as a node in a regional content graph, because the reward points the player at the next set of nodes.
Closing the design loop
The dragon stone chamber puzzle is a useful object lesson because it does very little and does it well. The memory-fragment tutorial is clear, the disk rotation is readable, the reward is layered, and the failure modes are recoverable. A team that wants to build a similar encounter does not need a new mechanic, a new engine, or a new tool. The team needs a clear separation of tutorial and mechanic, a visible goal state, a reward with a tail, and a QA plan that knows what “recoverable” means for that specific room. Those are the four decisions that turn a circular stone pit into a chamber a player remembers, and they are the decisions that any studio, working in any engine, can ship in a single content drop.
For developers who want to keep building on the pattern, the next step is to take a second chamber in the same game, break it down with the same structure used in this article, and compare the two. The differences between two rooms in the same world are usually more revealing than the differences between two rooms in two different worlds, and they are cheaper to study.
Frequently asked questions
Where is the dragon stone chamber puzzle in Crimson Desert?
The dragon stone chamber puzzle sits roughly 700 meters south-southeast of Hernand Town, at the bottom of a large hole in the ground that is easiest to reach from the Howling Hill camp. The chamber itself is a near-circular pit with a single mural on the northern rock face. From the camp, the path runs southeast along the road until the ground opens up and the drop becomes visible.
Do I need the Sword of the Cursed memory to solve the dragon stone chamber puzzle?
Yes. The memory is the soft tutorial that teaches the door input, and the door input is what lets the player into the disk chamber. Without the memory, the player can still find the pit, but the door into the disk chamber will not respond to a normal interaction. The Visone is the tool used to trigger the memory, and it should be equipped at the mural before any other interaction.
Do I need to find all the murals in the region to solve the disk puzzle?
No. The disk-rotation stage of the dragon stone chamber puzzle does not require the player to track down the regional murals. As long as the three disks are rotated into the correct configuration, the puzzle will complete and the door will open. The murals in the region are part of the wider content arc, but they are not a hard prerequisite for the chamber itself.
What is the reward for solving the dragon stone chamber puzzle?
The reward is a bundle. Solving the chamber opens a side room that contains an Abyss Cresset, the Abyss Artifact, and the Memories of Abundance. Together those unlocks expose the hidden place locations around the Hernand region, which is where the chamber’s reward starts to pay off in the wider world.
Can I leave the chamber mid-puzzle and come back?
Yes. The disk state is part of the save data, and the chamber is designed to be re-entered. A player who has rotated one disk, left the room, and returned should find the disk in the same orientation they left it. The same applies to the door: if the door has not been opened, it will be locked again on return.
Is the dragon stone chamber puzzle the same as the Sword of the Cursed puzzle?
They are two stages of the same encounter. The Sword of the Cursed puzzle is the memory-driven door stage, and the dragon stone chamber puzzle is the disk-rotation stage that sits behind that door. Players sometimes treat them as two separate puzzles because they have two separate solutions, but the design treats them as one encounter with two transitions.
What is the easiest way to reach the chamber if I have not unlocked the Howling Hill camp?
The fastest route without the Howling Hill camp is from Hernand Town, heading south-southeast until the ground opens into the pit. The route is roughly 700 meters and is exposed to random encounters along the way. If the player has already unlocked fast travel to a nearby camp, that camp is usually a quicker starting point than Hernand Town itself.
Does the chamber reset if I fail the disk puzzle?
The chamber does not have a hard fail state. The disks remain in the orientation the player left them in, and the door stays locked until the correct configuration is reached. There is no penalty for partial progress, and there is no timer. The puzzle is designed to be solved at the player’s own pace.
Is the dragon stone chamber puzzle accessible for players who skip the memory cutscene?
The memory cutscene is the soft tutorial, and skipping it makes the door stage much harder to read. Players who cannot or do not want to watch the memory can still brute-force the door by experimenting, but the puzzle is designed to reward players who watch the memory and connect the painted tree to the mural. A team building a similar encounter should consider a soft hint after a single failure.
How long does the dragon stone chamber puzzle take to solve?
For a player who watches the memory and reads the disk symbols, the puzzle takes a few minutes of focused interaction. For a player who skips the memory or who does not connect the painted tree to the mural, the puzzle can take noticeably longer. The design’s time budget is closer to the first number, and the second number is the failure mode that QA should plan around.

Leave a Reply