
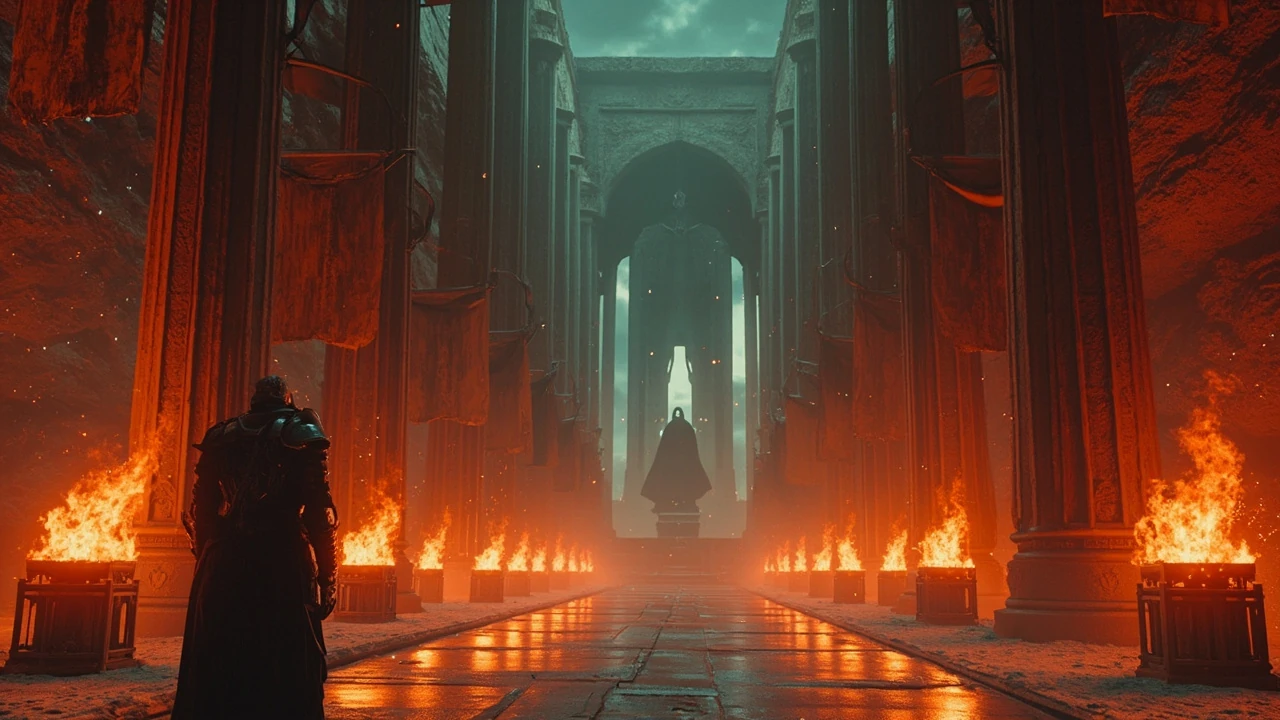
A hidden chapel carved into the cliffs of the Hernand region holds the Sanctum of Absolution, one of Crimson Desert’s more discussed optional encounters. It sits far from the main road between Pailune and the Demeniss border, which is why most players reach it only after a friend mentions a “stone bishop” or after stumbling across the marker on a long detour. The encounter itself is short, but the way it links story fragments, traversal skill, and combat tuning makes it a useful case study for designers thinking about how a single side dungeon can carry narrative weight without breaking the open-world pacing.
This guide covers what to expect when you approach the Sanctum of Absolution in Crimson Desert, how the encounter is structured, and the design decisions that shape it. It is written for two overlapping readers: players who want a clear walkthrough, and developers who want to understand why the encounter feels different from a standard field boss fight. Along the way, it compares the Sanctum to the other Hernand monoliths, looks at the reward branches in practical terms, and flags the small mistakes that turn a fair fight into a frustrating one.
Sanctum of Absolution in Crimson Desert: what it actually is
The Sanctum of Absolution is an optional dungeon, not a main story mission. It belongs to a small family of “monolith” sites that Pearl Abyss places in regions where the open-world map is otherwise sparse. Each monolith offers a self-contained story, a tuned combat challenge, and a reward that is interesting without being essential. The Sanctum of Absolution is the largest of the Hernand monoliths and the one most players miss on a first playthrough. It is also the one most often cited when players try to explain what Crimson Desert is doing differently with its optional content compared to other large open-world releases.
Three things make it stand out from a typical open-world shrine or bandit camp:
- It is a closed arena with a single scripted boss and no reinforcements, which means difficulty comes from the encounter design, not from the encounter count.
- It carries a small narrative thread about a disgraced knight order that ties into a later main-story beat, so completion changes how several NPCs greet you.
- It is locked behind a minor traversal puzzle, so reaching it requires paying attention to the environment, not just following a quest marker.
For developers, the monolith structure is worth noting because it solves a common open-world problem: how to deliver a high-fidelity, hand-tuned encounter without forcing every player to find it. Crimson Desert places several monoliths in each region, but never more than a handful, so each one can afford a level of polish that the wider bandit-camp system cannot. The approach is closer in spirit to a Souls-style optional boss than to a standard MMO side quest, and that comparison is part of why the encounter is so often discussed in design circles.
There is one more thing worth saying up front. The Sanctum is not a “secret” in the sense of being hidden behind a glitch or an exploit. The trigger is a soft conversation cue at the Pailune inn, and the entrance is on a visible part of the map. Most players miss it because the open world is full of louder markers, not because the encounter is locked away.
Where to find the Sanctum of Absolution
The Sanctum of Absolution sits on the eastern edge of the Hernand plateau, roughly north of the Pailune checkpoint and east of the Greyveil shrine. There is no fast-travel point on top of it; you have to ride or walk to the marker. The route is short on the map, but the terrain is rough, and the encounter begins before you reach the entrance, with a guaranteed bandit ambush partway up the cliff.
The fastest route from the Pailune main gate is:
- Follow the cliffside road north out of Pailune until you reach the abandoned watchtower just past the first bridge.
- Take the secondary path that forks east, marked by two leaning wooden posts and a faded cloth banner.
- Climb the switchback up the rock face. The climb is gentle but long, and there is a guaranteed bandit ambush at the second turn.
- At the top, cross the rope bridge that spans the ravine. The bridge is narrow enough that you cannot summon a mount on it.
- Look for the cracked stone arch set into the cliff wall. The Sanctum entrance is directly behind it.
Players often get turned around on step two, because the official road continues straight toward the Demeniss border and the eastern fork is easy to miss at speed. If you pass a ruined cart with three broken wheels, you have gone too far north and need to backtrack about two hundred meters. The cart is the most reliable landmark, because it does not move between patches and it is visible from the main road.
There is also a faster approach for players who have already unlocked the Greyveil shrine waypoint. Ride to the shrine, head east along the ridge until you reach the ravine, and drop down to the rope bridge from above. This path skips the switchback ambush entirely, but it requires a longer initial ride and a slightly tricky dismount, so most first-time visitors use the Pailune route.
Traversal requirements
You do not need a specific mount or weapon to reach the entrance, but two things help:
- A reliable mid-distance bow, because the bandit ambush on the switchback often opens with a throwing-spear volley from above.
- At least one healing item that recovers stamina as well as health, because the rope bridge approach forces a brief sprint across open ground.
The Sanctum itself has no platforming puzzles, no timed doors, and no inventory checks. The only gatekeeping is the climb, which is intentional design: it filters out players who wander in without preparation, and it makes the arrival feel earned. That same logic shows up in several other Hernand monoliths, which suggests the climb is part of the encounter’s identity, not just a route to it.
Preparing for the encounter
The Sanctum of Absolution is tuned for a mid-game player. If you arrive at the recommended level for the surrounding region, the fight is challenging but fair. If you arrive under-levelled, the encounter is a wall, because the boss has very high poise and the arena is small enough that you cannot kite indefinitely. There is no environmental shortcut that lets a low-level player skip the tuning, which is part of why the encounter has a reputation for punishing unprepared visitors.
| Recommended stat | Suggested value for the Sanctum | Why it matters |
|---|---|---|
| Player level | Region level or 2 above | Scales the boss’s damage and the reward tier |
| Weapon upgrade | At least the second-to-last smithing tier for your weapon class | The boss has high armor; low-health encounters drag on without upgraded weapons |
| Armor weight class | Medium, with one piece swapped to a heavy piece if you expect block-heavy play | Stamina management is the deciding factor in phase two |
| Healing item count | Six or more mid-tier potions | There is no bench inside the arena |
| Stamina recovery | One food buff that grants passive stamina regen | Phase two uses continuous dodges rather than blocking |
| Ranged option | Any bow or throwing weapon with at least twenty ammo | The switchback ambush is much easier with ranged pressure |
You can enter with a lighter build, but you should plan to use hit-and-run tactics rather than trading blows. The arena has a few low walls that you can break line of sight behind, but the boss is tuned to flush you out with area attacks if you hide too long, so the safe answer is to learn its timing rather than camp behind cover. Players who try to brute-force the encounter with a glass cannon build tend to die in phase two, when the boss starts chaining attacks without recovery windows.
One small but useful tip: enter the Sanctum from the side of the entrance opposite the main door. The first scripted line of dialogue fires as soon as the player crosses the threshold, and standing on the far side of the room when it triggers buys you about a second of free setup time. That second matters more than it sounds, because it lets you open with a buff or a stance change before phase one begins.
Quest structure and how it fits the Hernand story arc
The Sanctum of Absolution sits inside a small quest chain that starts at the Pailune inn. An old knight named Ser Avret, who appears in the main story as a background character, mentions in passing that he has not heard from his old order in years. If you speak to him a second time, he gives you a hand-drawn map that points toward the Sanctum. This is a soft trigger, not a tracked objective, which is why many players miss it. It is also the only place in the region where Ser Avret has more than one line of dialogue, which makes him a useful navigation target on its own.
The chain has three steps:
- Speak to Ser Avret twice at the Pailune inn to receive the map.
- Locate the Sanctum and defeat the boss, “the Bishop of Ash.”
- Return to Ser Avret and choose whether to give him the recovered relic, keep it, or destroy it.
The interesting design choice is that the third step branches, but none of the branches are flagged as morally correct. Returning the relic makes Ser Avret a permanent vendor with a small discount and unlocks a line of dialogue in the late-game church siege. Keeping the relic adds it to your collection and gives you a usable buff item. Destroying the relic removes it from the game but unlocks a unique line in the post-credits scene. The design intent is to make the player feel the weight of a small, personal decision rather than a save-the-world choice. The same three-branch structure shows up in two other Hernand monoliths, with different rewards, which makes the Sanctum a useful template to learn early.
For players who care about the late-game church siege, the Sanctum is one of the few early-region encounters that touches that arc at all. It does not change the outcome of the siege, but it changes how it feels, because two of the NPCs in the assault react to whether you returned the relic. That small payoff is the kind of detail that rewards repeat runs and second characters, and it is one of the reasons the encounter has a longer shadow in the community than its short runtime suggests.
The Bishop of Ash boss fight
The Bishop of Ash is a tall, slow enemy built around a small number of clearly telegraphed attacks. The fight is split into two phases and a short transition cutscene, and it is designed to be readable on the first attempt rather than punishing you for not having watched a guide. The boss has no hidden second phase, no transformation, and no adds. Every difficulty curve in the fight is the result of a deliberate tuning choice, which is part of why it is so often used as a teaching example for restraint in boss design.
Phase one: the courtyard
In phase one, the Bishop of Ash uses three attacks in rotation:
- A two-handed vertical slam that creates a small shockwave on impact. The slam is slow, but the shockwave reaches about two meters further than the weapon itself.
- A horizontal sweep that hits the entire front arc. The telegraph is a brief shoulder turn, and the safe answer is to roll behind the Bishop rather than away.
- A short dash with a thrust. The dash is the fastest attack and the most punishing, but it stops early if you bait it by standing just outside its maximum range.
Phase one is about patience. The Bishop has a long stun window after the thrust attack, which is where most of your damage should land. Greedy players die to the shockwave, which means the encounter teaches a single rule very quickly: stop hitting after the slam. That single rule is the entire design intent of phase one, and it is worth learning before phase two starts, because the same rule applies in a tighter form later.
There is also a small environmental cue that many players miss. The floor of the courtyard has a faint circular pattern, and the shockwave always originates from the center of that pattern. Players who fight near the edge of the room can use the pattern as a reference for the slam’s hitbox, which makes the early phase much easier to read.
Phase two: the inner sanctum
At roughly fifty percent health, the Bishop retreats into a smaller inner room and gains a new attack set. The arena shrinks, so most of the same rules apply, but the new attacks change the rhythm:
- A triple-slam combo that ends with a ground eruption. The eruption hits a circular area around the Bishop, and the safe answer is to stay close to a wall rather than run away.
- A prayer stance that buffs the Bishop and heals a small amount of health over time. The buff can be interrupted with a heavy attack, but only during the first second of the stance.
- A grab that targets the player directly in front of the Bishop. The grab is rare, but it is the only one-shot attack in the encounter, and it is signalled by the Bishop raising one hand for about half a second.
Phase two rewards players who interrupt the prayer stance and who avoid the grab by staying slightly to the side of the Bishop rather than directly in front. The eruption is the most common surprise, because the safe answer is counterintuitive: rather than running, you should hug a wall. The design lesson here is that arena geometry is part of the encounter, not a backdrop. The inner sanctum is shaped specifically so that running from the eruption puts the player in the hitbox, while standing near a wall puts them outside it.
Players who learn the eruption timing usually clear phase two in under two minutes. Players who keep running from it tend to spend most of the phase chasing the boss around the room, which is a good way to burn through potions and end the fight with nothing left for the cleanup.
Rewards and what they actually do
Completing the Sanctum of Absolution grants three categories of reward. The first is the relic itself, which has a function depending on your post-fight choice. The second is a small set of crafting materials. The third is the “Absolution” title, which is purely cosmetic and displays next to your character name in the multiplayer menu. None of the rewards are required for any other encounter, which keeps the Sanctum firmly in the optional category, but each reward has a small knock-on effect elsewhere in the game.
| Reward | How you get it | What it does |
|---|---|---|
| Knight Captain’s Relic | Defeat the Bishop of Ash and choose to keep it | Equip item that grants +5% damage against human enemies for ten minutes, single use per rest |
| Black Iron Cinders | Dropped by the Bishop on defeat | Crafting material for one specific armor set, no other use |
| Ser Avret’s gratitude (vendor branch) | Return the relic to Ser Avret | Unlocks a permanent vendor with rare upgrade materials and a discount on one item class |
| “Absolution” title | Any branch of the third quest step | Purely cosmetic, visible in the multiplayer nameplate |
| Late-game dialogue branch | Destroy the relic | Unlocks a unique line in the post-credits scene and one extra codex entry |
| Repeat-run tokens | Defeat the Bishop on any repeat clear | Small amount of currency used at the post-game blacksmith |
For most players on a first playthrough, returning the relic is the highest-value choice because the vendor discount is permanent and applies to rare materials that are otherwise gated behind time-limited events. The cosmetic title is the smallest reward, but it is the one that experienced players tend to notice, because it marks you as someone who completed a hidden encounter in an early region. Destroying the relic is the rarest choice, both because most players do not think to do it and because it requires a specific menu interaction after the boss dies, which is easy to miss if you are still picking up loot.
There is also a small, undocumented bonus to clearing the encounter on a first try without dying. It does not show up in the rewards list, but it does add a single line to Ser Avret’s vendor dialogue that references the flawless clear, and that line is the only place in the game where the encounter is acknowledged as a personal feat rather than a quest step. It is the kind of detail that is easy to miss and impossible to forget once you have seen it.
Design lessons from the Sanctum of Absolution
The Sanctum of Absolution is a useful encounter to study because it does a lot with a small set of pieces. There is one boss, one arena, one quest chain, and three reward branches, but the experience feels distinct from the surrounding open world. The reason is that each piece is doing real work, and each piece is tightly scoped. That tight scope is rare in large open-world games, where optional encounters are usually padded with adds, escort steps, or backtracking, and it is part of why the Sanctum is so often cited in design discussions.
Three design decisions stand out.
Soft triggers instead of tracked objectives
Ser Avret does not hand you a quest marker for the Sanctum. He mentions a missing order, and if you follow up, you get a hand-drawn map. There is no waypoint on the HUD that says “go here next.” This is a deliberate choice: it preserves the sense of discovery that open-world games promise and rarely deliver, and it makes the encounter feel like a story beat rather than a checklist item.
The trade-off is that many players miss the encounter entirely. Pearl Abyss accepts that trade-off, because the Sanctum is explicitly optional, and the design philosophy across Crimson Desert is that important optional content should be findable but not surfaced. The same pattern shows up in several other regions, which suggests it is a system rather than a one-off. For a wider look at the game’s structure and release context, the Crimson Desert Wikipedia entry covers the monolith system alongside the broader open-world framework, and it is a useful reference for how the design fits into Pearl Abyss’s longer development history.
A small arena with a small moveset
The Bishop of Ash has six attacks in total across both phases, which is fewer than most open-world bosses. The arena is also small, with very little room to disengage. Both choices serve the same goal: every attack has to be readable, and every mistake has to be punishable. If the Bishop had a fifteen-attack moveset, the encounter would feel random. If the arena were the size of a small village square, players would kite indefinitely. By keeping both numbers low, Pearl Abyss makes the encounter feel like a duel rather than a DPS race.
For developers, the lesson is that readability scales with restraint, not with feature count. A small moveset on a small arena is often more engaging than a large moveset on a large arena, because the player has fewer decisions to make and can focus on executing the ones they do make. The same principle shows up in the Hollow Watch monolith on the Demeniss border, which uses a similarly small moveset on a similarly small arena with a different boss archetype underneath. The pattern is consistent enough that experienced players can predict the structure of a new monolith within a few minutes of entering it, which is the point: the system is meant to lower the cognitive cost of engaging with optional content, while the boss design and the narrative thread keep each monolith feeling fresh.
Branch rewards that branch experience, not just loot
The third quest step branches, but the branches change how the game world reacts to you rather than which gear set you wear. Returning the relic changes Ser Avret’s vendor inventory. Destroying the relic changes a post-credits line. Keeping the relic adds a usable buff item. None of these branches is strictly better than the others, and none of them gates a specific build or playstyle. A practical read on how that approach holds up across the rest of the game is in the Press-Start Crimson Desert review, which spends a fair amount of time on the optional content and on the way branched rewards are used to keep the world feeling reactive without forcing a single “correct” path.
This is a mature approach to reward design. Many open-world games branch quests into “good ending” and “bad ending” states, but the practical effect is usually a single dialogue change. Crimson Desert instead branches into a vendor, a buff, and a narrative beat, which means the choice has mechanical, utility, and story consequences in roughly equal weight. The design lesson is that branch rewards should branch the kinds of value the game offers, not just the cosmetic value of a title screen.
How the Sanctum fits the wider Crimson Desert dungeon system
The Sanctum of Absolution is one of about a dozen monolith sites in Crimson Desert, and it is the most polished of the Hernand set. The other Hernand monoliths follow the same template: a soft trigger, a small arena, a tuned boss, a branched reward, and a small narrative thread. What changes is the combat system underneath. That consistency is one of the more underrated parts of the design, because it lets players learn the template once and then focus on the variable part, which is the boss itself.
| Monolith | Region | Soft trigger | Boss archetype | Reward branch type |
|---|---|---|---|---|
| Sanctum of Absolution | Hernand | Ser Avret, two conversations | Slow, readable knight | Vendor, buff, narrative |
| Hollow Watch | Demeniss border | A torn page in a ruined outpost | Fast dual-wielding raider | Crafting material, vendor |
| Quiet Garden | Pailune outskirts | A child’s drawing on a tavern wall | Ranged caster with summons | Summon upgrade, narrative |
| Iron Confession | Northern coast | A wanted poster mentioning a heretic | Defensive tank with shield bash | Armor set, narrative |
| Burnt Reliquary | Southern Hernand | A passing comment from a merchant | Glass cannon with fire area attacks | Buff, vendor |
The pattern is consistent enough that experienced players can predict the structure of a new monolith within a few minutes of entering it. That predictability is the point: the system is meant to lower the cognitive cost of engaging with optional content, while the boss design and the narrative thread keep each monolith feeling fresh. For developers, the template is also a useful test bed for new combat ideas, because each monolith is a contained scenario that can be tuned, art-directed, and shipped without touching the wider open-world systems.
Common mistakes when approaching the Sanctum
Players who struggle at the Sanctum of Absolution usually fall into one of a small number of patterns. Recognising them in advance makes the encounter much easier, and most of them are the kind of mistake that is obvious in hindsight but easy to make on a first attempt. None of them are bugs or exploits; they are the natural result of bringing habits from other open-world games into an encounter that does not reward them.
- Running away from the slam shockwave. The shockwave extends further than the weapon, so backing off lands you in the hitbox. The safe answer is to roll forward, through the slam, and to the side.
- Ignoring the prayer stance in phase two. The stance heals the Bishop over time, and a failed interrupt is a free heal. If you cannot land a heavy in the first second, repositioning is a better use of that second than a normal attack.
- Spending all healing before phase two. The arena has no bench, and the transition cutscene does not refill flasks. Players who enter phase two with one potion left are usually forced to play defensively for the rest of the fight.
- Equipping heavy armor for the climb. Heavy armor does not help with the encounter and slows the climb. The bandit ambush on the switchback is easier in medium armor with a ranged weapon.
- Skipping Ser Avret’s second conversation. The first conversation is flavour. The second is the actual trigger. If you leave after the first, the Sanctum will not appear on any map.
- Entering the arena before the dialogue finishes. The first scripted line of dialogue gates the encounter. Players who skip it end up in a broken state where the boss never spawns, which forces a reload.
- Selling the Black Iron Cinders early. The cinders have no resale value at any vendor, and they are the only source for one specific armor set. Selling them is irreversible, and most players do not realise the mistake until the relevant crafting recipe unlocks much later.
None of these mistakes are obvious on a first attempt, which is why the encounter punishes unprepared players more than unskilled ones. The Bishop of Ash is a fair boss; the Sanctum of Absolution is a fair dungeon. The combination is a small but well-designed reminder that optional content in Crimson Desert rewards attention, not just combat skill.
What players and developers take away from the encounter
For players, the Sanctum of Absolution is a short, well-tuned encounter that delivers a meaningful choice and a small but real reward. It is the kind of optional content that makes the Hernand region feel hand-crafted rather than procedurally filled. It also serves as a useful gateway to the rest of the Hernand monoliths, because the same template shows up in every other site in the region with a different combat theme underneath.
For developers, the encounter is a case study in three things that show up across the rest of the game:
- Soft triggers preserve discovery in an open world that already has a fast-travel and quest-marker system.
- Small movesets on small arenas produce readable, learnable combat without sacrificing difficulty.
- Branched rewards that branch experience, not just loot, give optional content lasting weight in the wider game.
For a studio like Pearl Abyss, which is building Crimson Desert on the same engine that powers Black Desert Online, the monolith system is also a useful test bed. Each monolith is a contained scenario that can be tuned, art-directed, and shipped without touching the wider open-world systems, which makes the system scale across a very large map without ballooning the team needed to maintain it. That kind of modularity is harder to design than it looks, and the Sanctum of Absolution is one of the cleaner examples of it in the game.
If you have not yet visited the Sanctum of Absolution in Crimson Desert, the easiest way to start is to ride to Pailune, find Ser Avret in the inn near the main gate, and talk to him twice. If you have already cleared it, the same template will lead you to the rest of the Hernand monoliths, each of which uses a similar structure with a different combat theme underneath. The encounter is short, but the system around it is one of the more interesting pieces of dungeon design in the current open-world landscape, and it is well worth the detour on its own terms.
Frequently asked questions
Is the Sanctum of Absolution a main quest or a side quest in Crimson Desert?
The Sanctum of Absolution is a side quest, not part of the main story. It is part of a small optional chain that starts with a conversation in the Pailune inn, and it is fully skippable. The main story does not reference it, although one late-game NPC has a small line of dialogue that changes if you completed it, which can feel like a callback rather than a main-story beat.
What level should I be to fight the Bishop of Ash?
The recommended level is the regional level for Hernand or two above. The encounter is tuned for a mid-game player who has cleared the surrounding bandit camps, and it is intentionally difficult for players who arrive under-levelled. If you are below the regional level, the fight is a wall, and you should either return later or bring a friend for co-op, which scales the encounter in your favour.
Can I replay the Sanctum of Absolution boss fight?
Yes. After you complete the encounter once, the Sanctum becomes a repeatable dungeon with a shorter pre-fight section. The reward is reduced on repeat runs, and the third quest step is only available on the first run, so you do not lose anything by replaying it for practice.
Does the Sanctum of Absolution change if I play co-op?
Co-op scales the encounter for two players, with the Bishop gaining extra health and slightly faster attack timing. The arena does not change, the moveset does not change, and the rewards do not change. Co-op is a valid way to learn the encounter, but the canonical experience is solo, because the timing windows are designed for one player.
Which post-fight choice is the best?
There is no best choice. Returning the relic to Ser Avret gives a permanent vendor with a useful discount and is the highest mechanical value. Keeping the relic gives a usable buff item that is helpful for a specific encounter later. Destroying the relic changes a post-credits line and a codex entry. Most players return the relic on a first run, because the vendor is the most consistently useful, but the choice is meant to feel personal rather than optimal.
Is the Sanctum of Absolution connected to the late-game church siege?
Yes, but only in a small way. If you returned the relic to Ser Avret, he appears as a vendor near the church siege and has one extra line of dialogue during the assault. If you kept or destroyed the relic, he is still present, but the dialogue branch is different. The connection is a flavour callback, not a major plot point, and the church siege plays out the same either way.
How long does the Sanctum of Absolution take to clear?
A first clear usually takes between twenty-five and forty minutes, including the climb, the encounter, and the return to Ser Avret. Experienced players who know the route can clear it in about ten minutes, and a speedrun of just the boss fight is around three minutes. The climb is the longest section on a first run, because it includes the bandit ambush.
Can I enter the Sanctum of Absolution without the hand-drawn map from Ser Avret?
Yes. The map is a soft trigger, not a hard requirement. If you find the cracked stone arch and rope bridge on your own, you can enter the Sanctum and complete the encounter without ever speaking to Ser Avret. The only difference is that you will not have the quest step to return to him, and the branched reward will default to “keep the relic.”
Does the Sanctum of Absolution scale with New Game Plus?
It does. On a New Game Plus run, the Bishop of Ash gains new attacks, the arena gains a few additional hazards, and the rewards are upgraded to the next tier. The soft trigger from Ser Avret is unchanged, which means the encounter remains optional, but the encounter itself is a legitimate challenge on a high-level NG+ character rather than a trivial clear.
Is the Sanctum of Absolution worth doing if I only have time for a few side dungeons?
Yes, especially on a first run. It is one of the better-tuned monoliths in the Hernand region, and the branched reward has lasting mechanical value. The encounter is also a good example of Crimson Desert’s optional content design, so it is useful as a reference point for the rest of the monoliths. If you are short on time, the Sanctum is the one most worth prioritising before moving on to the main story beats in the next region.

Leave a Reply