
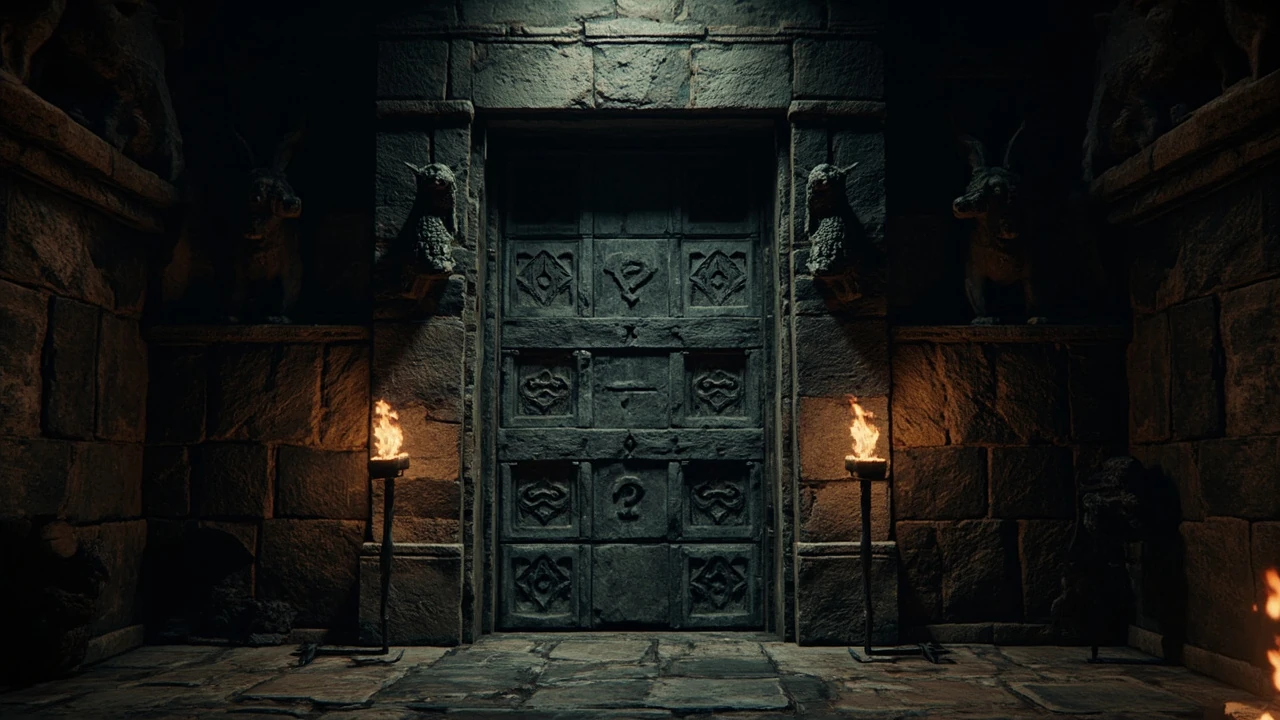
Walking up to a locked door in Hogwarts Legacy can stop a player cold, especially when the only clue is a row of carved animal crests and a handful of glowing question marks. The arithmetic door mechanics in the game are an elegant design decision, because they turn exploration into a small, self-contained logic problem that any player can solve with the right mental model. Understanding the Hogwarts Legacy door puzzle as a system, rather than a single room, makes every later variant faster to read and clears out the busywork of backtracking through the castle.
This article covers what the door puzzle is, how the arithmetic mechanic actually works, the two main shapes the doors take in the world, the most common mistakes players make, and why the mechanic matters as a design pattern in open-world action RPGs. It is written for players who want a clean walkthrough and for developers interested in the level design choices behind it.
What the Hogwarts Legacy door puzzle actually is
The Hogwarts Legacy door puzzle is a recurring environmental puzzle built around a simple arithmetic mechanic. Each locked door has two rows of carved glyphs: a top row showing a question mark next to a value, and a bottom row showing two numbers and a value or symbol set. The player must work out which number or creature belongs in the question mark slot, walk up to the matching sculpture on the door frame, cast Alohomora if the door is locked by magic, and rotate the sculpture until it matches the answer.
Mechanically, the doors are designed as small, deterministic math problems. There is no timer, no penalty for guessing, and no inventory cost for trying again. The challenge is purely interpretive: read the symbols, do the arithmetic, and apply the answer. Because the same rule set governs every variant, learning one door teaches the player every other door in the game.
From a player perspective, the puzzles serve three purposes. They break up the rhythm of combat and traversal, they reward careful observation of the environment, and they gate small treasure rooms containing cosmetic items, gear, or crafting resources. From a design perspective, they are a low-cost way to add repeatable, randomized content to a hand-built castle interior without writing a complex quest chain for each one. The mechanic also gives the level art team a reason to place distinct carvings in otherwise identical corridors, which is why the castle interiors feel decorated even on side passages that lead nowhere important.
The arithmetic rule behind every door
Every Hogwarts Legacy door puzzle shares one rule. The top row of glyphs shows three symbols with a question mark, a number, and a second number. The bottom row shows the same set of three symbols with a different arrangement. The relationship between the top row and the bottom row is a single arithmetic operation, and the player must work out which number or symbol completes the equation.
The operation is almost always addition or subtraction of the values represented by the creature crests. Each crest on the door frame has a fixed numerical value shown when the player focuses on it. The values for the most common crests are listed in the table below. Memorising these values, or keeping the table open on a second screen for a first playthrough, removes the only real friction in the mechanic.
Multiplication and division are not used in the base game. The door logic is deliberately limited to a domain of five small integers and two operations, which is what allows the designers to ship dozens of unique door layouts without breaking the player’s ability to solve them quickly. If the game had used larger numbers or extra operations, the puzzle would shift from a moment of reading to a moment of calculation, and the pacing of exploration would slow down.
Crest values used in the arithmetic doors
| Crest | Symbol | Value | Where it appears |
|---|---|---|---|
| Demon | Stylised horned head | 5 | Lower dungeons, Defence Against the Dark Arts tower |
| Quincy Hagrid-style beast | Round-eared face | 3 | Many standard castle doors |
| Unicorn | Horned horse head | 2 | Central halls, library wings |
| Hydra | Three-headed serpent | 4 | Restricted areas, side rooms |
| Spider | Multi-legged figure | 1 | Occasional late-game doors |
These are the five values seen in the released base game. A handful of DLC rooms reuse the same crests in different combinations, so the table is stable across the campaign. The values are intentionally small single-digit numbers, which keeps the arithmetic in the player’s head rather than on paper. The order of the crests in the table matches how often each one appears in practice, with the Demon crest showing up most often and the Spider crest being the rarest of the set.
How to read a door in three steps
Once the values are familiar, reading a door is a fixed routine. Most players solve each one in under a minute after the first two encounters.
- Stand in front of the door and look at the top row. Identify the question mark symbol and the two creature crests with their values.
- Apply the visible operation. If the top row reads question mark plus Demon equals Unicorn, the missing value is 5 minus 2, so the question mark is 3 and the matching crest is the round-eared beast.
- Walk to the door frame, focus on the matching sculpture, and rotate it so its face points toward the door. The door will open as the values align.
Doors that are sealed by magic require Alohomora first. Casting the spell on a sealed door does not solve the puzzle; it only unlocks the mechanism so the sculptures can be rotated. The spell has its own unlock progression tied to side content, so early-game players may need to return later with a higher-level Alohomora. The unlock progression has three tiers in the base game, and each tier adds a new wave of sealed doors to revisit, which is why mid-game is the natural moment to start a door sweep.
The two shapes a door can take
The game ships with two distinct door shapes, and recognising which one the player is facing changes the read. Both use the same arithmetic rule, but the geometry of the puzzle is different.
Two-row arithmetic doors
The standard door has two horizontal rows of three symbols each, set into a stone arch. The top row holds the question mark and the bottom row holds the answer. This is the most common form and is what most players mean when they talk about the Hogwarts Legacy door puzzle. The top row reads as ? + A = B or ? – A = B, where the question mark and the matching crest share the same value. The player only needs to read the top row to solve it, but checking the bottom row confirms the answer.
The two-row doors are placed in clusters throughout the main castle floors, with the easiest combinations appearing early and the harder combinations reserved for the restricted wings. The progression is gentle on purpose, because the designers want the player to internalise the rule before they ever meet a sealed door or a high-value combination. A first-year student character will see mostly Demon and Unicorn values, while a fifth-year character will see Hydra and Demon combinations that require a quick subtraction.
Three-row double doors
The larger double doors have three rows and two question marks, one on each side. Each side is its own equation, and the player must solve both before the centre mechanism unlocks. These appear in higher-security areas such as the Map Chamber, the Headmaster’s office, and several restricted wings unlocked during the late-game story. The arithmetic still uses the same crests and values, so the mental model is identical; only the volume of work doubles.
The double doors also use a slightly different feedback cue. When one side is solved, the matching sculptures lock in place and a faint glow runs along the centre seam, signalling that the second equation is still active. If both sides are solved at once, the door opens with a heavier animation and a longer sound cue, which gives the player a small reward for solving both equations in quick succession.
Common mistakes and how to avoid them
Even though the mechanic is simple, there are a handful of predictable errors that waste time. The list below collects the most common ones, along with the diagnostic that confirms a player is on the wrong track.
- Treating the bottom row as a separate equation. The bottom row is a confirmation, not a new problem. Solving the top row automatically gives the bottom row’s arrangement.
- Mixing up the operation direction. A door that reads ? + 3 = 5 has an answer of 2, not 8. When the answer feels too high, switch from addition to subtraction.
- Rotating the wrong sculpture. Each crest has a face that must point toward the door. Rotating it so the face points away is the most frequent cause of a door that will not open despite the math being correct.
- Forgetting Alohomora. A door that refuses to rotate at all is almost always still sealed by the unlock spell. Cast Alohomora first, then rotate.
- Reading crests as icons rather than values. The carvings are stylised, and a tired player can mistake the Hydra for a spider. Focus the camera on each crest to bring up the value tooltip before solving.
The fastest diagnostic is to focus the camera on each crest and watch the value appear. If a value seems inconsistent with the crests seen in earlier doors, the player is probably misreading a Hydra as a spider or a Demon as a Quincy Hagrid-style beast. A reset of the camera angle usually clears the confusion. In a long session, the most common cause of a stall is simply eye fatigue, because the crests are small and the corridors are dim.
Where the doors sit inside the open world
The doors are scattered across the castle, the Highlands, and the DLC regions. The table below maps the door density to the player’s expected progression, so a save file can be checked against a checklist before a full clear.
| Region | Door density | Recommended level | Notes |
|---|---|---|---|
| Hogwarts, main floors | High | 5+ | Tutorial encounters, easy values |
| Hogwarts, restricted wings | Medium | 15+ | Requires higher Alohomora |
| Hogsmeade, side cellars | Low | 10+ | Mixed difficulty, some sealed doors |
| Highlands, ruined keeps | Medium | 20+ | Heavier enemy presence, single-row doors |
| DLC regions | Variable | 30+ | Reuses base-game crests with new layouts |
Doors do not respawn, and each is tied to a specific room. Skipping a door on a first pass is fine, but the room behind it will not be available later. A sweep of the castle in the mid-game, when Alohomora level 2 is unlocked, clears the majority of the doors in one focused session. The Highlands doors are best left for a post-story sweep, because the surrounding enemy camps add extra time per door and the rewards are weighted toward late-game gear.
Design lessons the arithmetic door teaches
For developers interested in how a small mechanic can carry a lot of design weight, the Hogwarts Legacy door puzzle is a useful case study. The system is essentially a constraint solver: each door is a tiny SAT-style problem with five possible values and a single unknown. Designing within those constraints means the designers could ship dozens of unique doors with very little per-room work, because the content is generated by the rules rather than scripted by hand.
The design choices that make the mechanic land are worth breaking out. They are general patterns, not Hogwarts-specific, and they apply to any studio working on environmental puzzles in an open world.
- Fixed domain of values. By keeping the value set to five small integers, the team kept the math in the player’s head and the test matrix small.
- Persistent feedback. The crests stay on screen, the values are visible on focus, and the sculptures visibly rotate. Every action has an immediate, reversible response.
- No penalty for failure. A wrong rotation does not reset progress or consume a resource. The cost of trying is one second of player time.
- Layered gate. The same door has a magic gate and a logic gate, and the two are decoupled. Alohomora controls access; the arithmetic controls progression.
- Reward framing. Behind every door is a small, useful reward. The reward is never required to finish the main story, which keeps the door optional for players who dislike the mechanic.
For a studio thinking about its own puzzle language, the takeaway is that a tight, well-explained rule set is more valuable than a long list of bespoke mechanics. The same principle shows up in design work for environmental puzzle systems in other action RPGs, where a single rule applied across many surfaces outperforms a large catalogue of one-off interactions. The Hogwarts Legacy door puzzle is also useful as a teaching example because the constraint set is small enough to fit on a postcard, which makes it a clean reference for internal design documentation and for studio postmortems.
For broader reading on the game’s release context and how reviewers framed its exploration systems, the original Guardian review of the game discussed the castle’s exploration loop as one of its stronger design choices, and the door puzzle is a visible part of that loop. The release coverage is also a useful reminder that the mechanic was never positioned as a headline feature, which is part of why it has aged well: it is small enough to ignore and consistent enough to trust.
How the doors fit Hogwarts Legacy’s wider design
The arithmetic door is one piece of a broader pattern in the game, where exploration content is split into self-contained micro-challenges. Field guide pages, Merlin trials, and the daedalian keys all follow the same template: a small, self-contained task with a clear rule, a visible reward, and no narrative dependency. The structure is what lets the open world feel dense without ballooning the quest count.
It is also why the Hogwarts Legacy door puzzle is more memorable than its size suggests. The mechanic is small, but it is consistently applied, and it is taught through play rather than through a tutorial pop-up. A new player who has never seen a door before can solve the first one inside a minute, and the same rule carries them through the rest of the campaign. That kind of design efficiency is what keeps a large world feeling coherent across a 40-hour playthrough.
The game’s approach to environmental puzzles, including the door system, sits inside a wider lineage of action RPGs that lean on readable, repeatable rules. For background on the title itself, including its development, reception, and place in the broader Harry Potter game catalogue, the Hogwarts Legacy entry on Wikipedia gives a useful summary of how the game was positioned at launch and how its systems were described publicly.
Player workflow for a full door clear
Players who want to clear every door in a single sweep can follow a stable workflow. It assumes Alohomora level 2 and a save file that has reached the late-game story.
- Open the map and mark every door icon in Hogwarts and the surrounding Highlands.
- Sort the marked doors by region and approach each cluster from a fast-travel point.
- Cast Alohomora on the first door in a cluster, then solve the rest in a loop. Solving one door rarely costs more than two minutes.
- Loot the room behind each door before moving on. The reward is fixed, so a cleared door is a one-time check.
- Return to any sealed door after unlocking Alohomora level 3. Sealed doors do not reset; they simply wait for the higher unlock.
A full clear of the base game is achievable in roughly 90 minutes once the rule set is familiar. Most players spend more time on navigation and enemy clears than on the puzzles themselves. The DLC regions add another 30 to 45 minutes if a player wants full completion, because the doors are spread across larger outdoor areas that require more traversal between encounters.
Troubleshooting a door that will not open
When a door refuses to open after a rotation, the issue is almost always one of four things. The list below pairs each symptom with the diagnostic and the fix.
- Rotations register but the door stays shut. The arithmetic is wrong. Re-focus on each crest and re-check the values. Subtract rather than add if the answer is negative.
- Rotations do nothing. The door is still sealed by magic. Cast Alohomora and wait for the lock icon to fade before trying again.
- The sculptures rotate, but the faces do not align. The chosen crest is wrong, not the rotation. Walk around the frame and compare the available crests to the values on the door.
- The door opens, then closes again. This is rare and usually points to a soft-lock in the puzzle state. Fast-travel away, then return, and re-solve from scratch.
If the problem persists after a fast-travel reset, the most likely cause is a stale rotation state. Walking far enough away to despawn the door and returning usually clears it. No door in the base game is genuinely unwinnable, because every equation is solvable by elimination given the five-value domain. In practice, the fastest reset is to save and reload, which forces the door state back to its default and clears any half-rotation animation that may have stalled.
How the mechanic compares to similar systems
The Hogwarts Legacy door puzzle is not the only arithmetic-driven environmental puzzle in modern action RPGs, but it is one of the more readable ones. The rule set is small, the feedback is consistent, and the rewards are honest. Compared to larger puzzle rooms in dungeon-crawler RPGs, the door mechanic trades spatial complexity for symbolic clarity: the player never has to move objects or rotate the camera, only read and rotate.
That trade-off is what makes the mechanic work in a large open world. A puzzle that required physical manipulation would force the player to stop moving, set down the controller metaphorically, and engage with the room. The arithmetic door instead asks for a glance and a rotation, which keeps the exploration flow intact. The design lesson is that puzzle density in an open world is often a function of how little a mechanic interrupts the player’s travel, not how clever the mechanic is.
What the mechanic teaches new players
For a player on a first playthrough, the door is also a quiet lesson in how the rest of the game communicates. The value tooltip on each crest is the first time the game explicitly displays a number on screen, and it is the first time a player’s rotation input is rewarded with a visible change in the world. That early feedback loop is what makes later systems like the daedalian keys and the Merlin trials feel approachable: the player has already learned the game’s vocabulary of rotation, focus, and small reversible actions.
The mechanic also teaches a soft rule about optional content. Every door leads to a side room, and none of those rooms gate the main story. The game is signalling, from the first door, that exploration is rewarded but not required. That signal is important in a 40-hour open world, because it tells the player that the game respects their time and that skipping content is a valid choice. The arithmetic door is, in that sense, a small contract between the game and the player about how optional content is going to feel.
Edge cases worth knowing
A handful of doors in the late game break the standard pattern in ways that are worth flagging, because they are the most common source of confusion in online walkthroughs.
- Doors with a single visible row. Some restricted wings have doors where the bottom row is partially eroded. The missing values can be inferred from the crests on the door frame, but the puzzle still uses the same arithmetic rule.
- Doors that reuse the same crest twice. A door that reads ? + Demon = Demon has an answer of 0, which is not in the value domain. In practice, the door instead reads as a confirmation that no rotation is needed and the door opens automatically.
- Doors inside instanced quests. A small number of story quests place the player in front of a door that has been pre-solved. The rotation animation still plays, but no input is required. These doors are not part of the open-world count.
These edge cases are rare, but recognising them saves a few minutes of confusion. The most common of the three is the eroded bottom row, which appears in two of the restricted wings in the main castle. The other two are mostly cosmetic: they exist to keep the world feeling varied without adding new mechanics.
Frequently asked questions
Are all Hogwarts Legacy door puzzles the same rule?
Yes. Every door in the base game and the released DLC uses the same arithmetic rule with the same five creature crests. The values and the operation change, but the mechanic is consistent, so learning one door teaches every door.
Do I need Alohomora to solve every door?
Only for doors that are sealed by magic. Unsealed doors can be rotated without the spell. Sealed doors require the matching Alohomora level, and higher-level seals are gated by the main story and certain side progression.
What do the creature crests mean?
Each crest is a fixed integer used in the arithmetic on the door. Demon equals 5, the Quincy Hagrid-style beast equals 3, Unicorn equals 2, Hydra equals 4, and Spider equals 1. Focusing the camera on a crest shows its value as a tooltip.
Can I solve the doors without memorising the values?
Yes. Every door shows the values when the player focuses on the crests, and the bottom row of the door acts as a confirmation. The values only need to be memorised if the player wants to solve the door without approaching it, which is rarely useful.
Do the doors respawn or reset?
No. Each door is a one-time interaction. Once a door is opened, it stays open for the rest of the playthrough, and the room behind it is permanently accessible.
Are the door puzzles required to finish the main story?
No. The main story does not require any door, and the rewards behind the doors are optional cosmetics, gear, and crafting resources. The doors exist for players who want extra exploration content, not as a story gate.
What is the difference between the small doors and the large double doors?
The small doors have a single equation and one question mark. The large double doors have two equations and two question marks, one on each side. The mechanic is the same on both, and the arithmetic uses the same crests and values.
Why do the doors exist as a mechanic?
They are a low-cost way to add deterministic, self-contained puzzles across a hand-built castle. The mechanic is small, but it is consistently applied, which gives the open world a sense of density without ballooning the quest count. It is the kind of design pattern that the broader game is known for, which provides useful background for this point.
Is the door puzzle well received by players?
Reception has been broadly positive in published coverage, with reviewers noting that the mechanic is simple, consistent, and respects the player’s time. The original review coverage of the game discussed the castle’s exploration loop as one of its stronger design choices, and the door puzzle is a visible part of that loop.
What should a player do first when stuck on a door?
Step back from the door, focus the camera on each crest to read the values, and write the equation in plain numbers. Most stalls come from a misread crest, not a hard equation. Once the values are clear, the operation is usually obvious.


Leave a Reply