
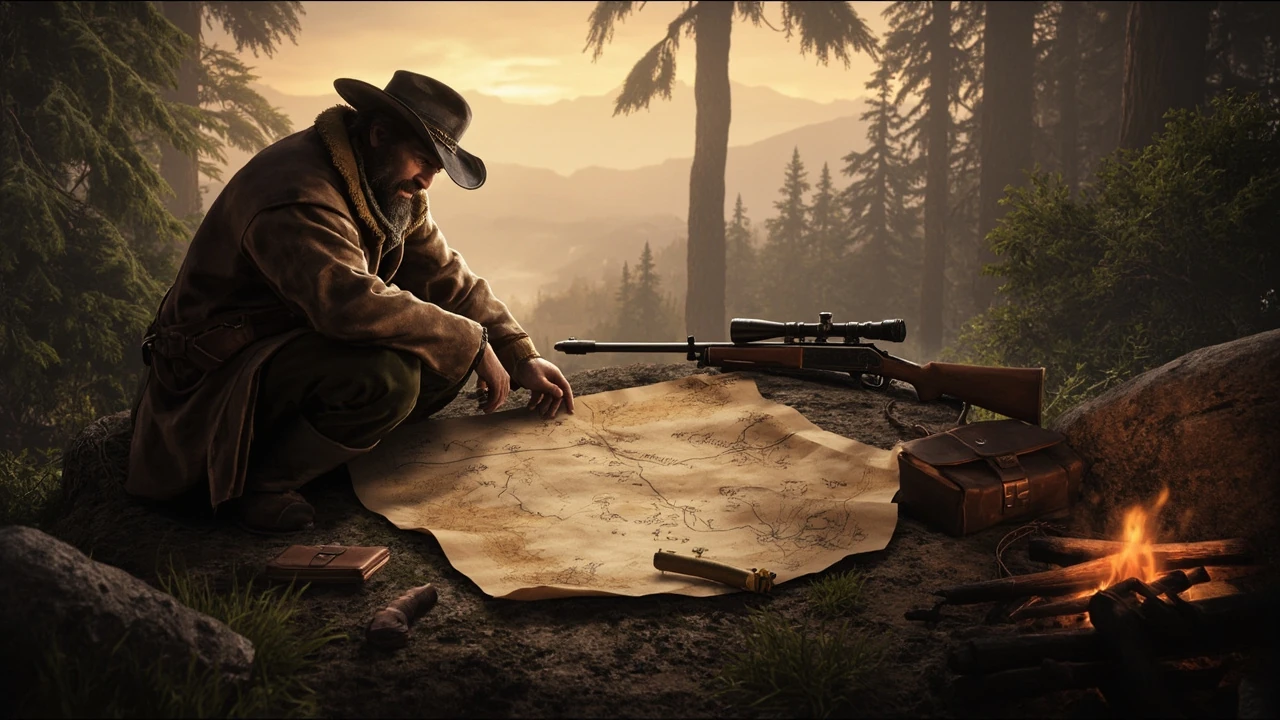
All legendary animals in RDR2: how the hunting system is actually built
Tracking all legendary animals in RDR2 means working through 16 unique hunts, each gated by story chapter, map region, and a small mastery loop built around a single sample item, a positional clue trail, and a guaranteed one-time spawn. The hunts behave like self-contained side content: each one has a discovery beat, a loadout decision, a kill moment, and a reward that feeds back into the rest of the world through crafting, camp upgrades, or trophy display. Reading the set as a checklist misses how the loop is wired, because Rockstar ties the hunts into the same open-world pacing model that the rest of the campaign depends on.
For a player, the practical question is direct: which animal lives where, what unlocks it, and what the carcass actually gives back. For a designer or engineer reading this page, the more interesting question is how a handful of spawn rules, a region-aware clue system, and a tightly authored pelt reward turn into 16 hours of optional content that most players voluntarily complete. This guide is written for both readings at once. The field data needed to finish the hunts is grouped up front, and the design and engineering mechanics are pulled out separately so the technical sections do not interrupt the route notes.
The 16-hunt set has been stable across every patch on PC, PlayStation 4, Xbox One, and the later console releases. The game design is described in the Red Dead Redemption 2 Wikipedia article as a layered open-world system with side activities tied to chapters, region, and economy, which is the framing this guide also uses.
How the legendary animal system is wired into the game
Before touching a single hunt, it helps to understand the few rules the game never shows you in a tooltip. Rockstar Games’ Red Dead Redemption 2 builds the legendary tier on top of the standard hunting system, with a separate spawn table, a per-animal sample item, and a single pelt reward that cannot be re-skinned if lost. The system was deliberately designed to stay stable across patches, because the rest of the game’s economy assumes that the 16 pelts always exist once per save file.
The mechanics that govern the hunts are simple on paper and surprisingly layered once you start looking at edge cases. The list below is the working mental model that experienced players and content designers tend to share when discussing how the loop fits into the world. Each rule looks small on its own, but together they explain why the 16 hunts behave the way they do.
- Each legendary has a unique sample item that must be inspected, worn, or carried to start the event. Without the sample, the spawn will never trigger, even if the player is standing on top of the spawn coordinate.
- Clue trails are positional. The game watches for proximity to a region-specific trigger zone rather than proximity to the player character directly, which is why some animals spawn behind a hill rather than on the obvious landmark.
- Spawning uses a single-instance rule per animal. After a successful kill, that legend cannot appear again on that save file, which keeps the 16-count deterministic across playthroughs.
- Pelt quality is locked. Legendary animals always produce a perfect pelt regardless of weapon choice, which removes the usual 3-star pressure and lets the player focus on loadout rather than shot placement.
- Carcasses despawn if ignored, but the pelt persists in the player’s inventory once skinned. The on-screen warning before skinning exists specifically because the pelt does not regenerate.
- Sample items are decoupled from spawns. The player can sell, drop, or store the sample on the horse without losing the quest, and the sample can be re-acquired from the same source on a return visit.
- Reward handoff runs through specific vendors. Trinket and talisman recipes only become visible at the Fence after the matching pelt is donated, and Trapper outfits require the same handoff on the crafting side.
These rules matter because they make the 16 hunts reliable to plan around. A player planning a route can trust that an unlocked animal will still be available after a long ride. A designer reading the loop as a reference implementation of optional content gating can see how each rule carries a small piece of the design load: gating, persistence, reward, and re-entry are all separated, which is what keeps the system stable over a 60-plus-hour open-world session.
What each legendary animal gives you
Every hunt ends in one of three reward channels: a crafting material, a trinket or talisman that grants a passive effect, or a camp upgrade token. Knowing which reward you want tells you which order to pursue the animals in, especially if you are optimizing for a specific playstyle or build. The table below summarizes the three channels and what each one actually does in gameplay terms.
| Reward category | What it does | Where it is spent | Example items |
|---|---|---|---|
| Crafting material | Unlocks a unique outfit or garment at the Trapper | Gus Macmillan Trapper in Saint Denis, Riggs Station, or Tumbleweed | Legendary Bear Pelt, Legendary Wolf Pelt, Legendary Panther Pelt |
| Trinket or talisman | Grants a passive buff when crafted into a satchel or worn | Fence vendor, requires a matching legendary carcass | Legendary Bear Claw, Legendary Wolf Heart, Legendary Buck Antler |
| Camp upgrade token | Contributes to ledger upgrades and camp cosmetics | Donated at the gang’s camp ledger | Legendary Moose Antler, Legendary Elk Antler |
The trinket and talisman path is the one most players chase first, because passive bonuses like slowed weapon degradation, improved health regeneration, and longer Dead Eye cores meaningfully change moment-to-moment gameplay. Crafting materials matter for fashion, roleplay, and screenshot builds, and the camp upgrade tokens are a slow-burn reward that pays off across long playthroughs as the gang’s camp gains a small but visible character through each donation. A useful planning insight: the trinket and talisman recipes are bound to specific legendary carcasses, so a pelt that is sold to a butcher can never be turned into its trinket later, which is why the donation path is almost always the correct choice.
Region map: where every legendary spawns
All legendary animals in RDR2 are tied to one of six broad regions, each with its own visual identity, elevation profile, and predator-prey balance. The table below is the high-density reference most players and route-planners use. Coordinates refer to the in-game map grid and assume the player has already acquired the relevant sample from a stranger, bounty board, poacher, or natural discovery. Elevation and biome notes are based on the visible terrain around each spawn rather than on internal data, which is what experienced players report in community maps.
| Region | Biome feel | Legendary species found | Best hub |
|---|---|---|---|
| Grizzlies West and Ambarino | Mountain forest, snow, fast rivers, dense pine | Bear, Elk, Moose, Wolf | Stagecoach from Valentine or Strawberry |
| Big Valley and Heartlands | Rolling plains, open sightlines, low brush | Buck, Pronghorn, Bison, Tatanka Bison | Riding from Rhodes or Emerald Ranch |
| Scarlett Meadows and Bluewater | Swampland, low visibility, dense brush, fog | Boar, Panther, Alligator | Fast travel to Rhodes, then south to the Old Tomb |
| Bayou NWA and Lakay | Mangrove, humid, murky water, cypress | Gar, Bull Gator | Saint Denis ferry, then ride south into the swamp |
| New Austin and Tumbleweed | Desert, cactus, dust storms, open rock | Cougar, Coyote, Snake, Pronghorn variant | Blackwater or Tumbleweed stagecoach |
| Roanoke and Cumberland | Forested river valleys, mild climate, mixed wood | Fox, Beaver, Ram, Bighorn | Van Horn Trading Post or Annesburg |
A useful planning insight is that the Grizzlies and the Bayou each account for four of the sixteen hunts, while New Austin and the Heartlands split the desert and plains content. If you are building a route, the efficient path is usually chapter-aware: chase the early-game accessible ones first, then return to the higher-elevation hunts after Chapter 6 unlocks the entire map. The reason the route planning matters is that a single failed attempt is rarely a single mistake, it is usually a long ride back to the spawn after losing the corpse to a predator, and grouping hunts by region cuts that cost dramatically. For broader context on the game’s design and reception, the Red Dead Redemption 2 Wikipedia page documents how the open-world system is structured and how it ties into the larger story.
Complete list of all legendary animals in RDR2
The list below covers the full 16-animal set as shipped in the base game. Each entry is paired with the item you receive from the relevant Gus Macmillan Trapper or Fence vendor, plus the practical unlock condition you need to plan around. The order is grouped by region for route planning, then ordered inside each region from easiest to hardest to find. Difficulty here reflects the spawn clarity, the predator aggression, and the loadout sensitivity, not the kill itself, because the actual kill is rarely the hard part.
| Legendary animal | Region | Sample source | Notable reward |
|---|---|---|---|
| Legendary Bear | Grizzlies West | Early Chapter 2 stranger encounter near the trapper’s cabin | Bear Claw trinket, Legendary Bear Coat outfit |
| Legendary Wolf | Cumberland Forest | Chapter 2 random encounter near Lake Isabella | Wolf Heart trinket, Legendary Wolf Headgear |
| Legendary Elk | Big Valley | Chapter 2, found by inspecting a fresh corpse on the road | Elk Antler camp upgrade token |
| Legendary Moose | Roanoke Ridge | Chapter 2, near the train bridge north of Annesburg | Moose Antler camp upgrade token |
| Legendary Buck | Big Valley, near Cattail Pond | Chapter 2, found on a poacher after a brief firefight | Buck Antler trinket, Buck Vest outfit |
| Legendary Pronghorn | Heartlands | Chapter 2, found inside a hollow tree stump | Pronghorn Horn trinket |
| Legendary Bison | Heartlands, north of the oil field | Chapter 4, dropped by a poacher camp | Legendary Bison Coat |
| Legendary Tatanka Bison | Heartlands, near the border with New Austin | Chapter 4, dropped by a poacher working the plains | Legendary Bison Horns hat |
| Legendary Boar | Scarlett Meadows, south of Rhodes | Chapter 2, near a destroyed wagon by a side road | Boar Tusk trinket |
| Legendary Panther | Scarlett Meadows, near the Old Tomb | Chapter 3, requires a specific clue chain to start | Panther Eye trinket, Panther Cloak |
| Legendary Alligator | Bayou NWA, south of Saint Denis | Chapter 4, found on a poacher in the marsh | Alligator Tooth trinket |
| Legendary Bull Gator | Bayou NWA, deeper swamp channels | Chapter 6, unlocked after the story finale | Bull Gator Tooth trinket, Bull Gator Hat |
| Legendary Gar | Bayou NWA, in the slow-moving waterways | Chapter 4, dropped by a fisherman on a dock | Legendary Gar Lure |
| Legendary Cougar | New Austin, near Gaptooth Breach | Chapter 6, unlocked after Guarma return | Cougar Fang trinket, Cougar Wrangler outfit |
| Legendary Coyote | New Austin, near the desert plains south of Tumbleweed | Chapter 6, found near a derailed train | Coyote Fang trinket |
| Legendary Snake | New Austin, near the Río Bravo | Chapter 6, found inside a satchel on a corpse | Snake Skin trinket, Snake Moccasins |
A small but important detail: the samples for several of the desert animals only become available after the Guarma chapter, even if the player physically rides into New Austin earlier. This chapter-gated availability is why so many players hit a wall at 12 or 13 hunts, then finish the remaining ones in a focused session after the finale. The same gating applies to the Bull Gator, which is one reason the Bayou can feel underused until late in the campaign.
Recommended loadout and preparation
Each hunt rewards a different tactical approach, but a few universal loadout choices will save you a failed attempt. A failed attempt is not fatal, because the animal respawns after a region reset, but it is a 10 to 20 minute round trip if you lose the carcass or spook the herd, and it is rarely worth chasing a panicked legendary on horseback through dense terrain. The list below covers the core loadout that experienced hunters tend to carry, and the regional notes after it cover the exceptions.
- Carry a scoped rifle for clean distance kills, ideally a rifle with a long scope to keep the legendary within visible terrain and to avoid spooking nearby herds.
- Keep a repeater as a secondary for the close-range predators, especially the panther and the cougar, where a missed first shot usually triggers a charge.
- Use a horse with high stamina and a calm temperament; the elk and moose regions punish a hot-blooded mount, and a spooked horse will throw the player mid-aim.
- Stock enough potent snake oil or similar tonics to survive a panic charge from a predator, and consider chewing tobacco for Dead Eye uptime on the tougher fights.
- Approach from downwind and use cover; the predator species detect scent and sight aggressively, and the panther in particular will despawn if the player runs into the trigger zone at full gallop.
- Keep the sample item in the player’s own inventory rather than the horse’s cargo, because the game reads player proximity, not horse proximity, when checking the sample flag.
For the swamp hunts, a shotgun is the safest answer because the brush blocks long sightlines, and for the river-based Gar hunt a small-game arrow is more efficient than a rifle since the encounter is on water. The desert hunts reward a different setup: a long scope and patience matter more than raw damage, because the cougar and coyote both run if they take a non-lethal first hit, and the Snake sample is a small object that is easy to miss in a dust storm. The design intent is straightforward to read: each region forces a different loadout decision, which is one reason the hunts feel varied across the campaign rather than a copy-paste of the same kill.
Chapter gating and how to plan your route
The game releases the legendary content in three waves. Understanding the wave structure helps you avoid wasted trips and lets you batch the hunts by region rather than chasing them in story order. The wave boundaries are not documented in a single in-game menu, but they are visible in how the sample sources appear, because every sample is dropped by an NPC, a corpse, or a discovery point that itself is gated by chapter progression. The table below lays out the three waves and what each one unlocks.
| Wave | Story window | Animals available | Planning note |
|---|---|---|---|
| Wave 1 | Chapters 2 to 3 | Bear, Wolf, Elk, Moose, Buck, Pronghorn, Boar, Panther | Map is partially restricted, but most regions are rideable from the main camp |
| Wave 2 | Chapters 4 to 5 | Alligator, Bull Gator, Gar, Bison, Tatanka Bison | Swamp hunts become reliable, full Saint Denis access unlocks the Fence |
| Wave 3 | Chapter 6 and Epilogue | Cougar, Coyote, Snake | Requires Guarma return, then New Austin access becomes safe to traverse |
If you are optimizing for trinket slots, the practical route is to complete all Wave 1 hunts in one focused session after Chapter 3, then return to the swamp for Wave 2 once Saint Denis has its general store and stable unlocked, and finally sweep the desert in Chapter 6 or the Epilogue when New Austin is safe to traverse. The reason this beats a pure story order is that each region has a natural hub town: Valentine for the Grizzlies, Rhodes for Scarlett Meadows, Saint Denis for the Bayou, and Blackwater for New Austin, and grouping by hub cuts long rides that eat into session time.
For completionists, the wave order is also useful because it lines up with the in-game progress menu. The progress page tracks each legendary by sample, kill, and donation, and the donation counter is the cleanest way to confirm that a Wave 2 or Wave 3 pelt has actually counted toward the Trapper and the Fence. This matters because the Fence is the only vendor that surfaces the trinket recipes, and it is easy to miss a handoff when a pelt is sold to a regular butcher instead.
Common failure modes and how to avoid them
Players report the same handful of failure patterns when working through the full 16. None of them are bugs, but they are easy to misread as such because the game gives very little UI feedback when a spawn fails to trigger. The list below is a quick diagnostic reference for the cases that come up most often in community discussions, plus the corrective action that resolves each one.
- The legendary does not spawn: usually the sample is in the horse’s cargo rather than the player inventory, or the player is outside the trigger radius. Fast travel away and back, then approach on foot from downwind.
- The pelt disappears after a predator attack: the legendary is not a quest item by default, so it shares the standard pelt rules. Skim and store it on the horse before engaging anything else nearby.
- Trinket recipe not visible at Fence: the trinket unlocks only after the legendary carcass is donated or sold to the right vendor. Check the Trapper and the Fence in turn, since the Fence is the only place the trinket recipes appear.
- Desert animal missing in Chapter 4: the desert hunts are gated by the Guarma chapter, not by location. Wait until you return to the mainland, then check the same spawn coordinate.
- Swamp gator respawns as a regular: confirm you are using the Legendary Alligator sample, not a standard gator bait. The visual difference between the two is small and the bait is sold by the Trapper rather than found on a corpse.
- Panther never appears: the panther requires a specific clue chain in Chapter 3, not just a sample. Restart from a nearby camp and approach the Old Tomb area on foot, at night, with the sample equipped.
- Wolf heart recipe shows but cannot be crafted: the legendary carcass must be skinned and the pelt donated before the recipe activates. Selling the pelt to a butcher locks the recipe for the rest of the playthrough.
These cases cover the majority of stuck-progress reports. They are also useful as content design references: each is a clean example of how gating, cargo management, and reward handoff can quietly interact in an open-world system, and each one shows up because the player was given several valid choices (sell, donate, store) and the wrong choice carries a permanent cost. Players who want additional context on how Red Dead Redemption 2 is referenced and parodied in other media can read the IGN feature on South Park’s Red Dead Redemption 2 references, which touches on how the hunting and open-world systems have been read by outside creators.
How the design pattern translates to other projects
For developers reading the system as a case study, the legendary hunt loop is a useful reference for layered optional content. It works because the design combines a small number of rules with a wide variety of authored content, and the rules are stable enough that players can plan a route across the whole set without ever hitting a hidden dependency. The same shape can be reused in other genres: a fishing table in a survival game, a bounty board in an action RPG, or a contract roster in a live service shooter. The mechanics that make it succeed are worth naming explicitly so they can be reproduced or adapted.
- Single-instance spawn keeps rewards meaningful and prevents farming. Once the legendary is killed, it cannot reappear, which means the reward is genuinely rare on a given save file.
- Per-animal sample items double as a discovery mechanic and a tutorial surface. The sample is the player’s first touchpoint, and it carries both the visual identity and the unlock condition in a single object.
- Reward variety across three channels lets players self-select a goal. A player who cares about cosmetics, one who cares about passive buffs, and one who cares about camp progression can each prioritize a different subset of the 16.
- Region clustering turns 16 separate quests into a 4-visit route, which improves completion rates. The cost of doing all 16 is low enough that most players attempt it, even without an achievement carrot.
- Chapter gating maps optional content to player progression without hard-locking it. The hunts are not required to finish the story, but they become available in step with the player’s map access and toolset.
- Decoupling the sample, the spawn, and the reward handoff keeps the system debuggable. A designer can change one without re-authoring the others, which is what kept the system stable across patches.
From a production standpoint, the budget cost of a single legendary animal is the rough equivalent of a small encounter: a spawn definition, a clue trail, a unique pelt asset, a reward entry, and a small handful of voice or ambient lines. The fact that Rockstar ships 16 of them and that players complete almost all of them is a useful sanity check on how authored encounter density translates into real engagement, because it shows that the bottleneck on optional content is rarely the number of entries and is almost always the cleanness of the loop that ties them together.
For teams working on smaller projects, the practical lesson is that the same rules can be implemented with far fewer authored entries. A 6-hunt set with the same gating, sample, and reward handoff rules will produce a similar completion-rate curve, because what drives completion is the quality of the loop, not the absolute count. The cross-genre applicability is real: a fishing minigame that issues a single sample, gates one rare fish per region, and routes the reward through a specialist vendor will behave the same way as the legendary hunts, because the player-facing mechanics are what matter.
Building an efficient run: a 4-visit route
If you want to finish the hunts quickly, the route below groups the animals into four trips that each return to a stable hub. The plan assumes you have access to fast travel and the relevant sample items, and that you are willing to deviate if a spawn fails. The trip boundaries are based on the in-game stable layout and the chapter access, so they hold across both a story-first and an exploration-first playthrough.
- Trip 1, Grizzlies sweep: Bear, Wolf, Elk, Moose. Use the Valentine stable as the hub, ride out in the morning, and skin everything on the horse before returning. The Grizzlies run is the densest in the game, and a single sweep from Valentine will cover all four northern hunts in a focused 60 to 90 minute session.
- Trip 2, Heartlands and Scarlett: Buck, Pronghorn, Boar, Panther. Use the Rhodes hotel as the hub, then swing south to the Old Tomb for the panther. The panther is the only hunt in this trip that requires a specific clue chain, so leave it for last and start the chain once the other three are skinned and stored.
- Trip 3, Bayou sweep: Alligator, Bull Gator, Gar. Use the Saint Denis stables, then ride into the swamp and out before dark. The Bayou is a hostile environment for the horse, so plan to dismount often and use the boat for the Gar spawn rather than trying to ride the waterways.
- Trip 4, Desert finale: Cougar, Coyote, Snake, plus the Bison pair if missed. Use Blackwater as the hub and ride carefully at dawn. The desert hunts are the most chapter-sensitive, so confirm the Wave 3 samples are available before leaving the hub, otherwise the trip is a wasted 30-minute ride.
This is a planning scaffold, not a strict order. Players who care about trinket slots will reorder the route to land the Bear Claw and Wolf Heart trinkets earliest, since those items shape the early economy, and players who care about Trapper cosmetics will reorder to grab the Bison pair before the desert finale, because the Bison Coat and Bison Horns are easier to wear out of the wardrobe than to track down later.
Engine and systems notes for technical readers
Looking under the hood, the legendary system is a good case study of how Rockstar’s open world handles entity persistence, sample-triggered spawns, and reward handoff without breaking save integrity. The two engineering details most worth noting are entity uniqueness and trigger region decoupling. Each legendary has a unique entity ID and a unique spawn region, which means the world can reference it without depending on player state. The sample item, by contrast, is fully decoupled from the spawn, so the player can drop, sell, or lose the sample without losing the quest. That separation is what allows the legendary to remain deterministic while still feeling like organic discovery.
A third detail worth pointing out is the reward handoff. The Trapper and the Fence each read from a separate data table that is keyed to the pelt, not to the kill event. The kill event marks the legendary as completed and sets a flag, but the trinket and talisman recipes are surfaced only when the matching pelt is donated or sold to the Fence. That is why selling a legendary pelt to a regular butcher locks the trinket recipe: the Fence never sees the pelt, so its data table never updates. The same pattern protects the Trapper outfits, which read from a Trapper-side data table that is independent of the Fence. The result is a small but reliable two-table handoff that is easy to debug and hard to soft-lock, even in a save file that is hundreds of hours old.
For technical artists and gameplay engineers reading this as a reference, three implementation lessons stand out.
- Use a single spawn slot per legend to avoid duplicate instances and keep pelt rewards clean. A duplicate-spawn bug would mean two legendary corpses on the same map, and the reward handoff has no clean way to resolve that.
- Keep sample, clue, and reward items on separate data tables so balancing one does not require re-authoring the others. The Trapper and the Fence should each read from their own table rather than from a single combined definition.
- Tie reward handoff to the pelt, not to the kill event, so that lost or sold pelts do not soft-lock trinket recipes. The kill event marks completion, but the handoff is a separate transaction that the player has to opt into.
- Decouple the sample item from the spawn trigger, so the player can move the sample around the world without losing the quest. The spawn is a function of player position and the legend’s flag, not of the sample’s location.
- Surface a progress page that tracks sample, kill, and donation as three independent booleans. The progress UI is the player’s only reliable way to plan the remaining hunts, and it should be readable at a glance.
If you are weighing engine choice for a similar loop, the same rules can be implemented in any modern open-world engine. The interesting question is not the engine, it is the data layout: how the spawn table, the sample table, and the reward table talk to each other. Get that right and the rest of the system follows.
Frequently asked questions
How many legendary animals are in RDR2 in total?
There are 16 legendary animals in the base game. They span six regions, with the Grizzlies and the Bayou holding the densest clusters. None of the animals require New Game Plus, and all 16 can be completed in a single playthrough if the player plans around the chapter gates and donates rather than sells each pelt.
Do I need to be in a specific chapter to start each hunt?
Yes. Wave 1 hunts unlock from Chapter 2, Wave 2 from Chapter 4, and Wave 3 from Chapter 6 after the Guarma return. If a legendary does not appear, the most common cause is that the player is too early in the story, not that the spawn is bugged. The samples themselves often appear in the world only after the matching chapter is reached, so a missing sample is usually a chapter issue rather than a missed discovery.
Can legendary animals respawn if I fail the hunt?
Yes, the spawn resets when the player leaves the region and returns, or after resting at a camp. The single-instance rule applies only to successful kills, so failed attempts do not consume the legendary. This is one of the more forgiving parts of the design, and it is also the reason a careful approach tends to pay off more than a rushed one.
What is the best order to hunt legendary animals in RDR2?
For trinket-focused players, start with the Bear, Wolf, Buck, and Pronghorn to unlock the most useful passive effects early. For completionists, the efficient order is the four-region route described in the trip plan above, because it groups hunts by stable hub and minimizes long rides. Either order works, and the difference in total time is small once the chapter gates are respected.
Do legendary animals count for the Master Hunter challenges?
Yes, the Master Hunter challenge tracks standard and legendary kills, but each legendary counts only once. The challenges are designed around volume, so you still need regular hunts to fill out the requirements. The legendary tier is best treated as a quality layer over the standard hunting system rather than a substitute for it.
What happens if I lose the legendary pelt?
If the pelt is lost in the open world, it is gone, which is why the game warns the player before skinning. The sample item can be reacquired from the same source on a return visit, but the unique pelt itself does not respawn. The trinket and talisman recipes also remain locked until the pelt is donated to the Trapper or the Fence, so a lost pelt is a real loss. The same logic applies to a pelt that is sold to a regular butcher, because the Fence never sees it.
Are legendary animals different in Red Dead Online?
Red Dead Online uses a different spawn table and a different reward channel, and it treats legendary content as part of the roleplay economy rather than the story loop. The base-game list of 16 is for the single-player campaign only, and the mechanics around spawns, samples, and pelts do not transfer directly. Online players who want the same set of rewards will need to redo the hunts under the online rules.
Is there a way to track which legendary animals I have already killed?
Yes, the progress page in the in-game menu lists every legendary and tracks whether the player has found the sample, made the kill, and donated the pelt. It also shows the rewards unlocked at the Trapper and the Fence, which makes it the cleanest way to plan the remaining hunts. The progress page is also the fastest way to spot a missing sample, because it shows the sample flag as a separate state from the kill flag.
Why is the Legendary Panther considered the hardest hunt?
The panther is widely considered the hardest because it requires a specific clue chain, a night-time approach, and a weapon that can one-shot it before it aggros. The spawn is in dense brush, the audio cue is short, and the panther will flee if you miss your first shot. The reward is generous, which is why so many players attempt it before they have the right loadout, and which is also why a failed first attempt is so common.
Do legendary animal rewards carry into the Epilogue?
Yes, all pelts, outfits, trinkets, and camp upgrades from the main campaign carry into the Epilogue, and the Trapper and Fence vendors remain active. The Epilogue also unlocks a small number of cosmetic rewards that are exclusive to the post-story window, which makes finishing the legendary set a natural part of the post-game loop rather than a separate task. The 16-count does not change, so an Epilogue player has the same target as a Chapter 6 player.


Leave a Reply